COURSE – Phone Photography
Welcome!
I am excited to start sharing with you some of my favorite ways I photograph my everyday life with my phone while still staying present in the moment, in hopes that you can too!
I love to capture moments in photograph form. When I first started my photography business years ago I felt the pressure (which was probably self-induced pressure) to not only capture every moment but to make sure I captured it perfectly on my DSLR camera. The only problem was, those cameras are heavy and I found myself either bringing it along and getting a headache from carrying my camera bag around my shoulder or I would just leave my camera at home and feel the guilt of not capturing any photos.
Thankfully in the last few years phone technology has made incredible leaps and I feel as though I can capture these everyday moments with my phone without completely sacrificing the quality.
I love that I now usually have at least one photo from each day. Photos that I will be able to look back on and will help me to remember a piece of what was happening during that time. Each photograph represents a memory, a moment in time that I want to remember forever.
Throughout this course you’ll see a lot of photos of my children. The content in the course is applicable whether you have kids or not, but for me, my kids are a large part of my day and I hardly take any photos they aren’t in! At the time of writing this Raeca is 4 and Ephraim is 2, if you follow me on Instagram you’ll probably notice I’ve dubbed my kids Raeca the Imaginative and Ephraim the Inquisitive, that is totally their personalities right now, I think it comes through in many of the photos I take and I’m curious to see how they change (and stay the same) over the next few years.
I also just want to mention that I have never once asked my children to say “cheese” to the camera (although, they have now picked that up from other kids). If I have one request for all other parents it is this; please never teach your child that “trick”. It just leads to unnatural shots that are posed and not true moments. As you look through the photo examples in this e-course you’ll find my children are hardly ever looking directly at the camera and it’s even more rare for them to be looking at it and smiling, it’s because I’m trying to capture the moment, not the smiling face. For the most part, the moments I want to capture are them engrossed in life, not stopping their life to look at the camera and smile. I find this helps for those rare times I do want them smiling at the camera.

If there is one thing I have learned as a parent it is that the old adage the days are long but the years are short could not be truer.
I want to document the days to remember them but I don’t want to let that distract me from being present in them.
In this course I am going to share how I try to live with intention each day, while still preserving the memories through photographs.
Let’s get started!

STAYING PRESENT
I wanted to start this e-course off with this section, to me this is the most important part, after all, what does it matter if you captured some great moments in the everyday if you weren’t really present to begin with?
There are a few different techniques I implement in my life to try to make sure that I don’t get so caught up capturing the moments that I completely miss being present in them.
HAVE YOUR PHONE ACCESSIBLE
For starters, make sure your phone is always close and ready to take photos, that way you don’t have to waste your time trying to find it when there is suddenly a moment you want to capture. The nice thing about phones is that they are easy enough just slip in your pocket, even if you have the oversized Note 3 like I do.
Also, if you have a password on your phone you can usually have a shortcut to your camera so you don’t even need to unlock it to take photos. This has been useful to me more times than I can count.
TAKE JUST A FEW SHOTS
I think the biggest thing that I find works for me is when there is a photo opportunity I’ll grab out my phone and take a few shots and then put my phone back in my pocket. I don’t want to be taking pictures the entire time or missing something by scrolling through my gallery to see if I captured the shot. This does mean that sometimes I’ll go back and find I missed the shot (though not very often) but personally, I’d prefer that than to miss being present in the moment.
SHARE PHOTOS LATER
When I do take the time to go through my photo gallery I try to make it happen during a time when people aren’t around and I’m not taking away from real life interactions just to scroll through my phone. That means a lot of time I’ll only get a chance to look through my photos when the kids are napping or having quiet time and then again later when they are in bed for the day. This also means that I pretty much never share photos “in the moment”, I don’t usually get a chance to share on Instagram or Facebook until well after the fact, but I think that’s a good thing and I don’t find I miss anything by sharing photos a few hours later, if anything it helps me to select only my favorite one or two to share from the day.
DON’T TAKE THE PICTURE
And sometimes learning to present means leaving the camera put away and just enjoying the moment as it happens without documenting it. I don’t do this very often but when I do I am very intentional about reveling in the moment.
CAPTUING THE EVERYDAY
Special vacations, holidays and momentous occasions are often easy to photograph, or at least easy to remember to photograph, but it’s the everyday that is often overlooked. When you look back over your own life so far you might remember a few big moments, but truly, it’s the little everyday moments that have shaped you into the person you are, those are what I find I’m trying to capture these days. Here are a few of my favorite tips and tricks for doing so.
DAILY ROUTINE
Often we don’t think about photographing those routine moments in our lives, those little things that happen everyday and we think we won’t forget, but the truth is, one day we probably will.
Some people like to challenge themselves to capture their routine by periodically having a specific date they will set aside to photograph “a day in the life”, generally it’s where they take a photograph every hour on the hour to document their day.
Personally I find I’m not disciplined enough to remember to take a photo every hour so I just try to capture different parts of our routine on different days as I remember.

Right now we are in the routine of having Ephraim wear his eye patch every day to strengthen his eyes, right now in life its routine but there will come a day where I will forget about this daily ritual.

“Susie” has been Rae’s favorite doll for years, I love capturing shots of her playing.
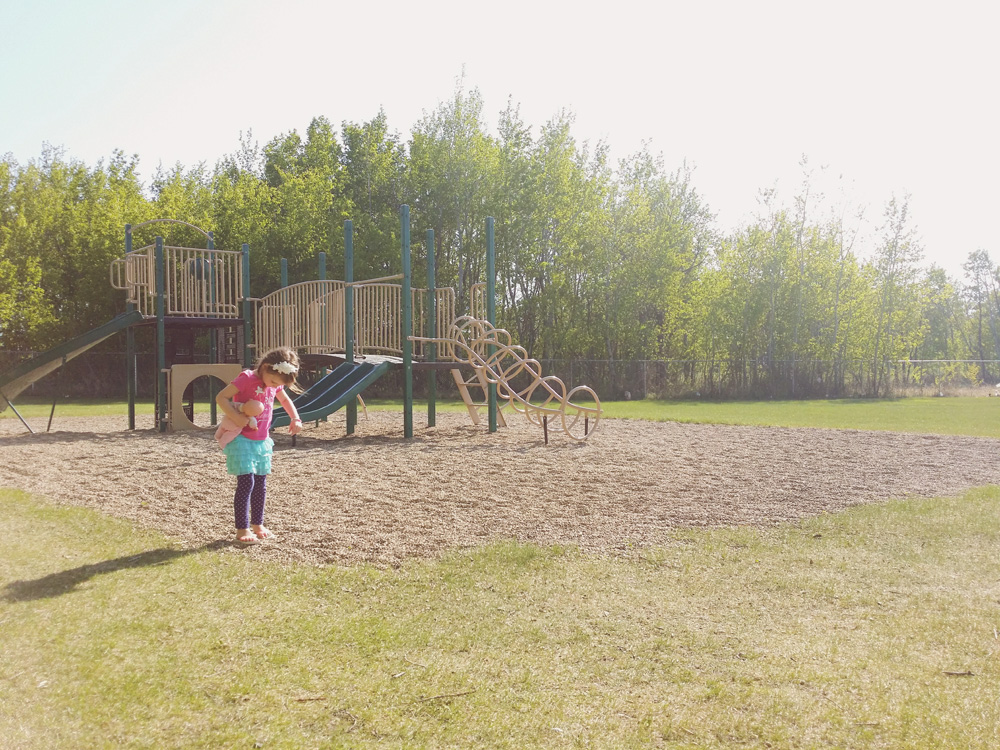
The playground, always playing at the playground. One day these times will be behind us so for now I capture them.
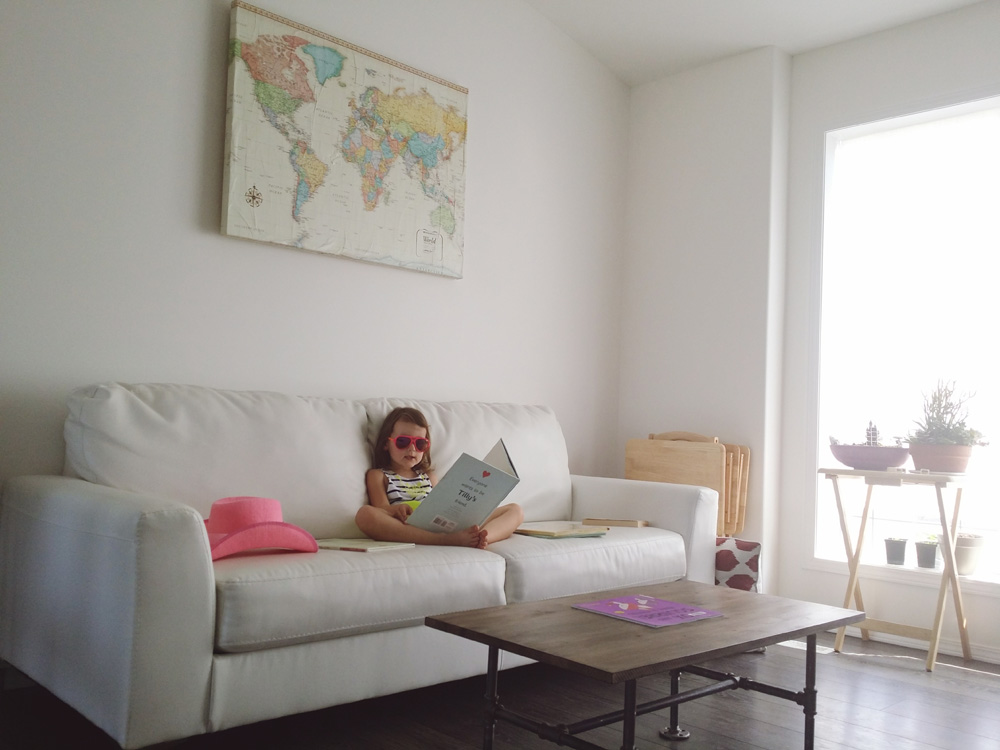
Reading is definitely a part of our everyday routine, I love capturing her reading in different spots.
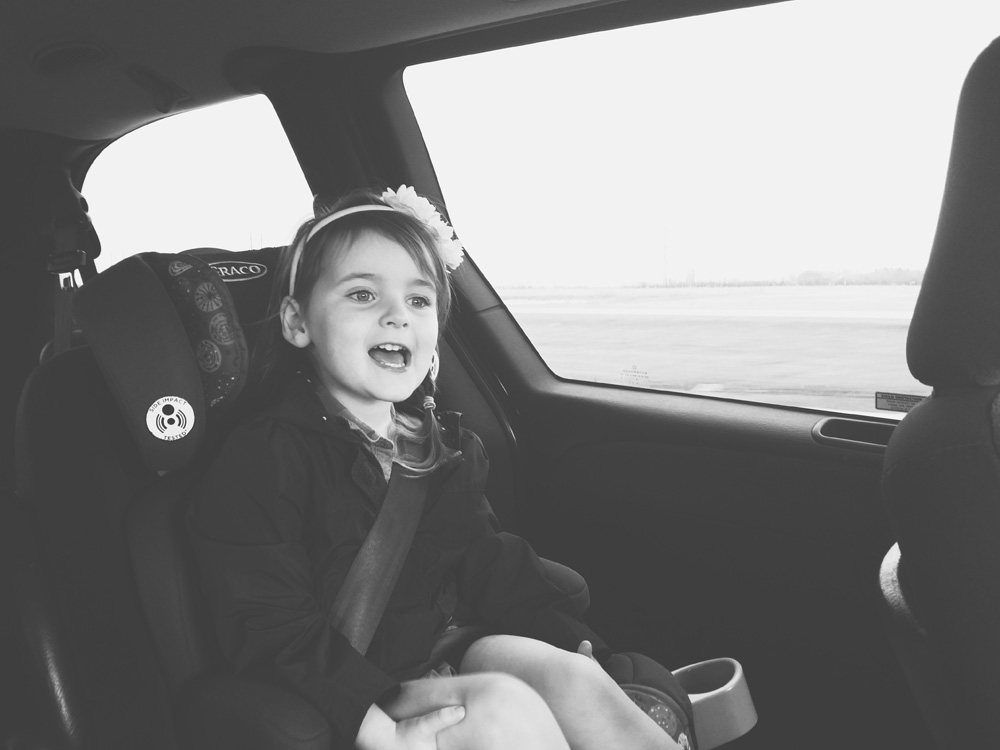
Singing so sweetly in the car “Jesus loves me this I know . . .”
TELLING A STORY
Just like books, images can tell a story. They can be short stories or longer ones. A photographic story could be as short as one image and as long as thousands put together.
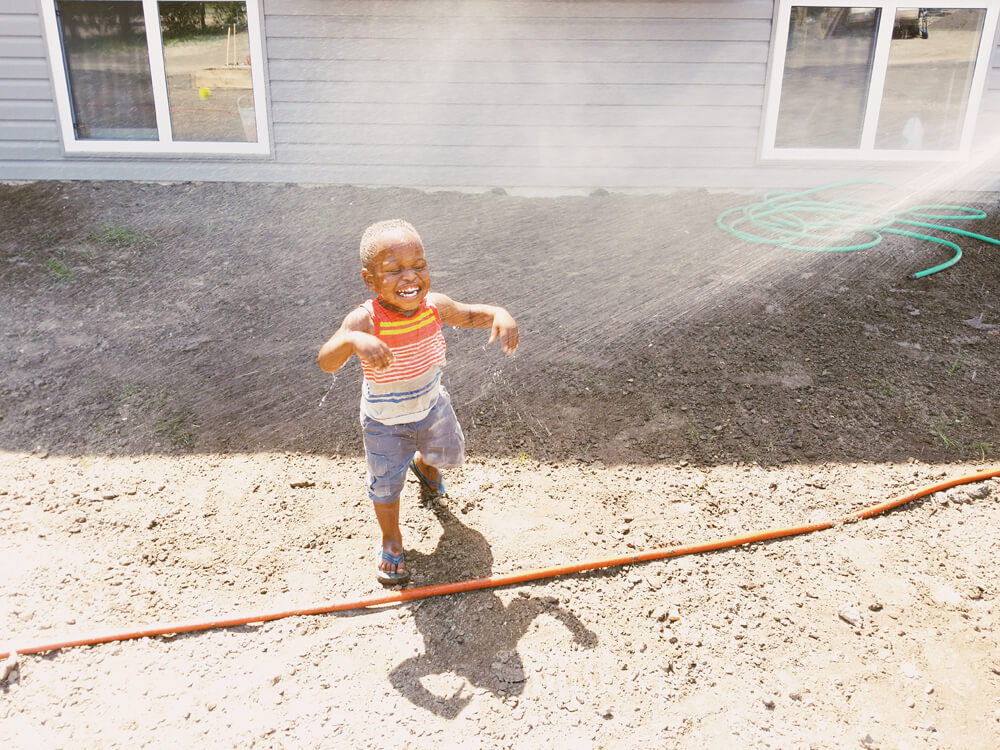
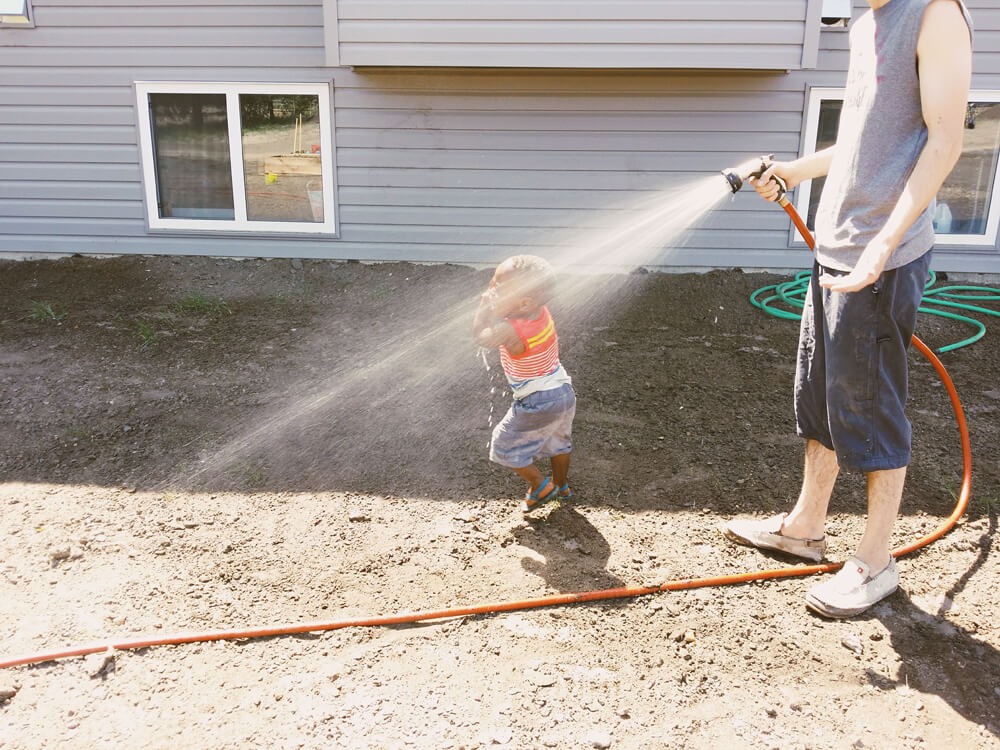
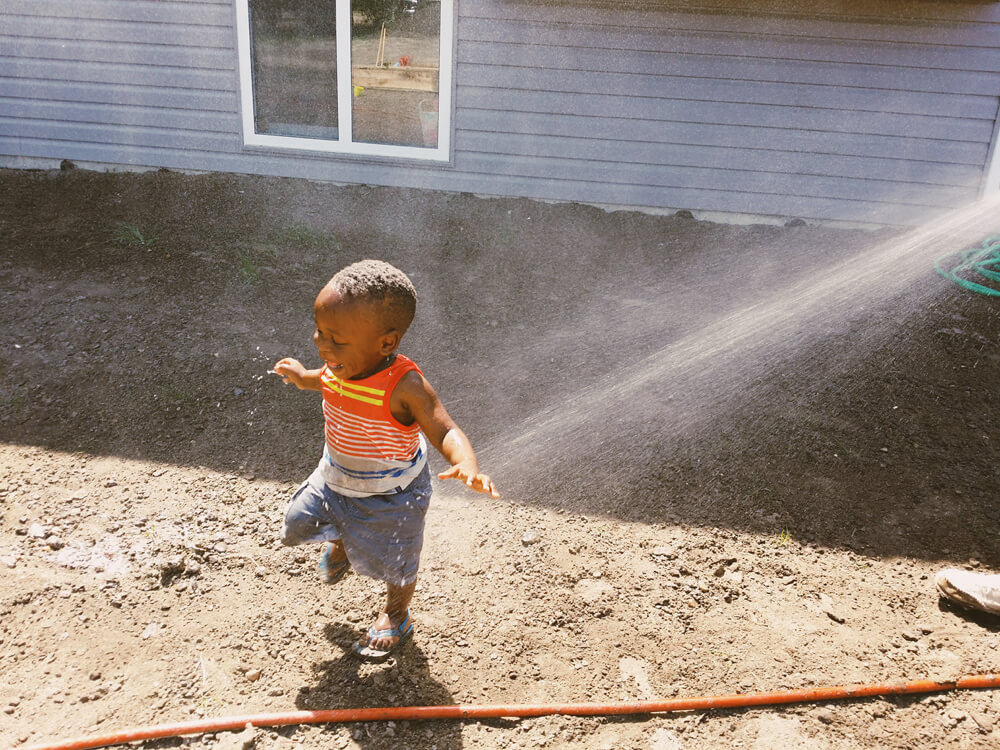
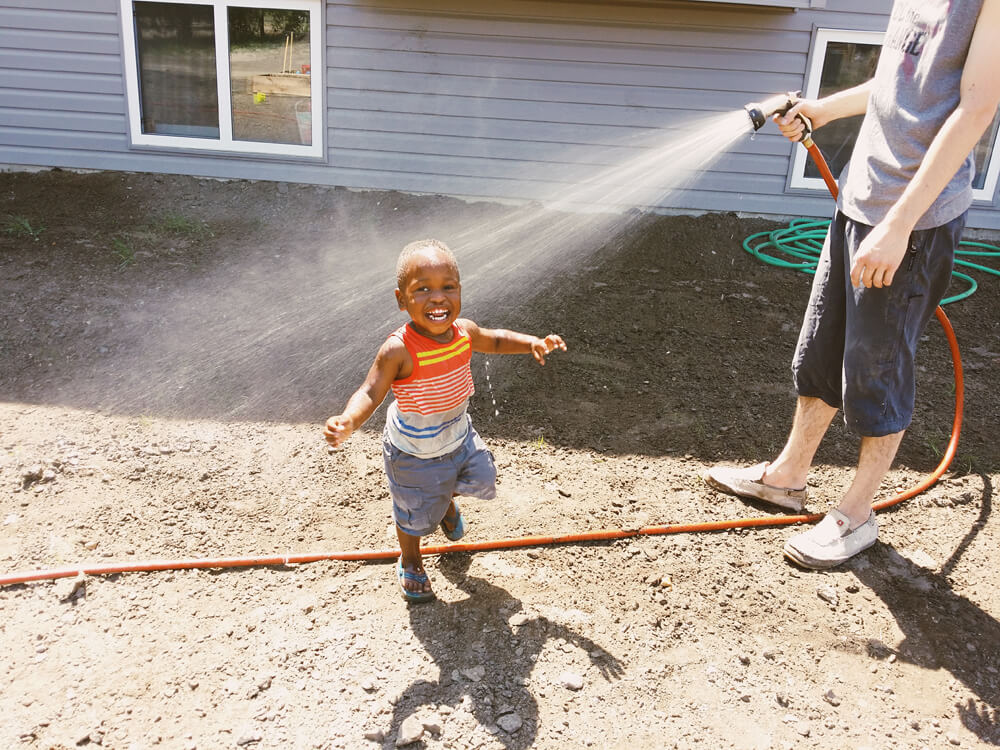
In many ways a series of shots taken fairly close together will tell a story, think about a time-lapse capturing photos every few seconds to photograph a quickly setting sun, a couple of photos of a girl twirling in a pretty dress. . . while one image can definitely tell a story you can get a more complete story when you have a couple of photos to go off of. For instance, in the photos below, each photo alone could tell a bit of a story but all six together tell a better (and let’s admit, funnier) one.

Telling a story with just one photo can be harder but still effective, and the photo might not tell a story to every person that looks at it, but as long as I can see the story behind it that’s what matters to me.
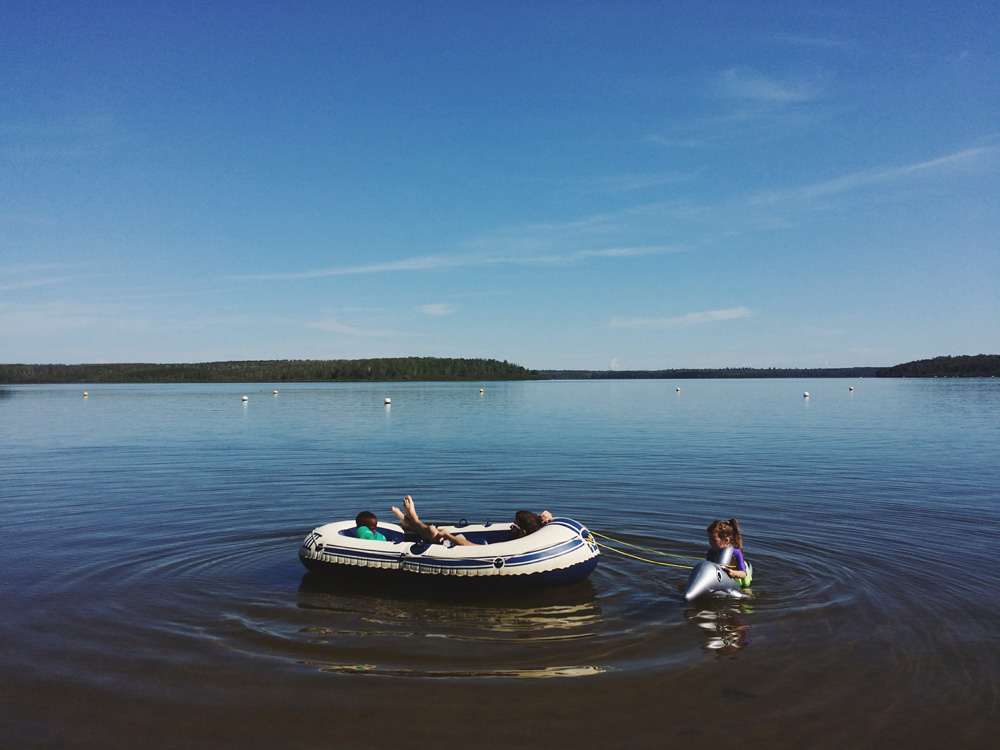
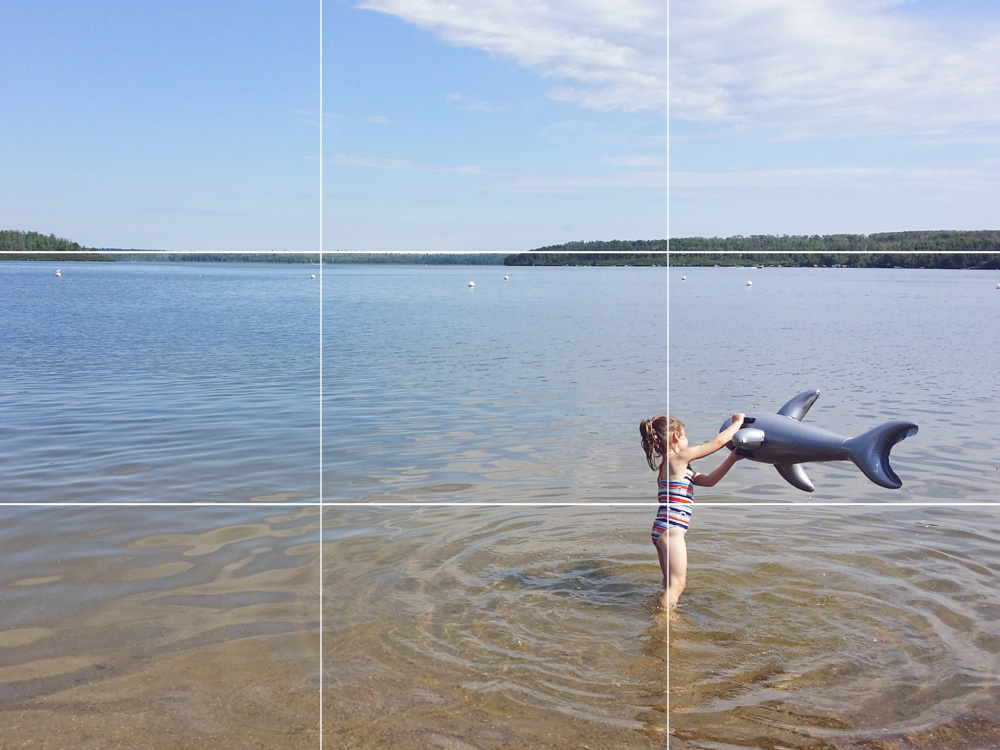
This photo will always sum up this camping trip we took this summer. All week long Raeca wanted to ride on the dolphin she named Trixie (“cause she does lots of tricks”) and pull the little dinghy behind, carrying anyone who would ride on it.
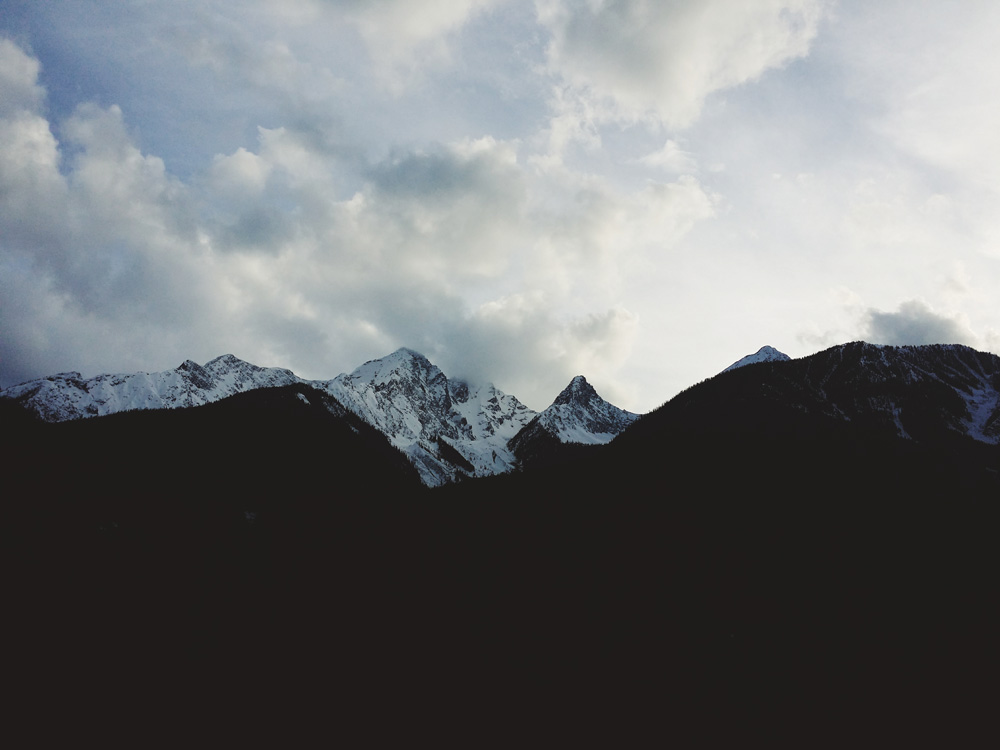
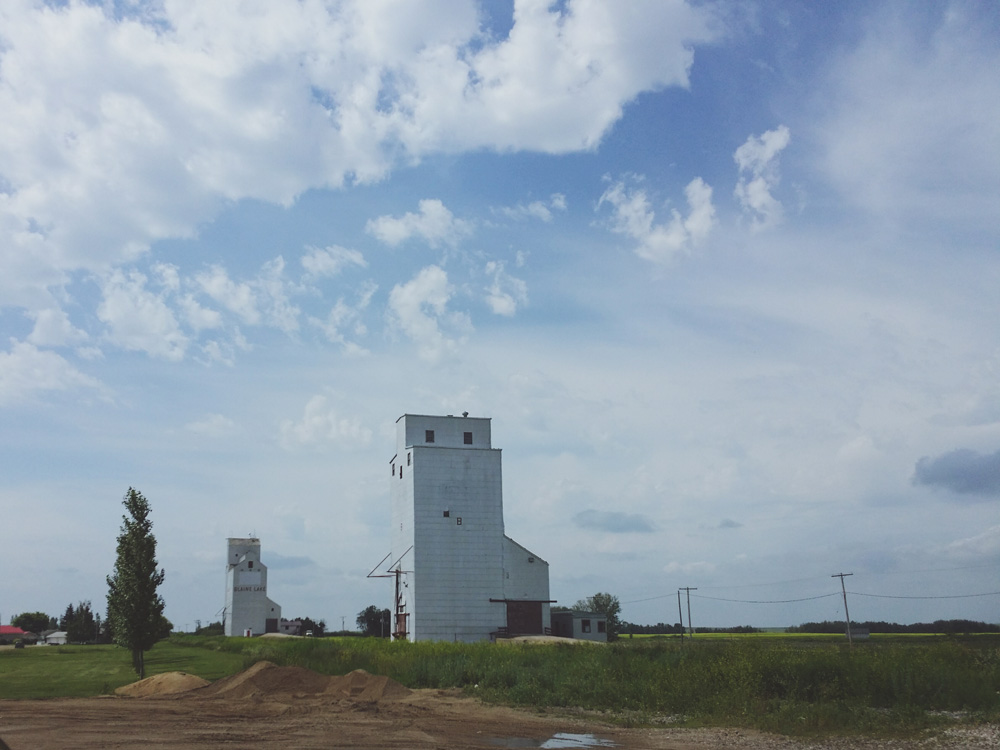
ZOOM OUT
When you want to tell a story with just one image one of the easiest ways to do so is to zoom out and capture some of the surroundings to help tell the story.
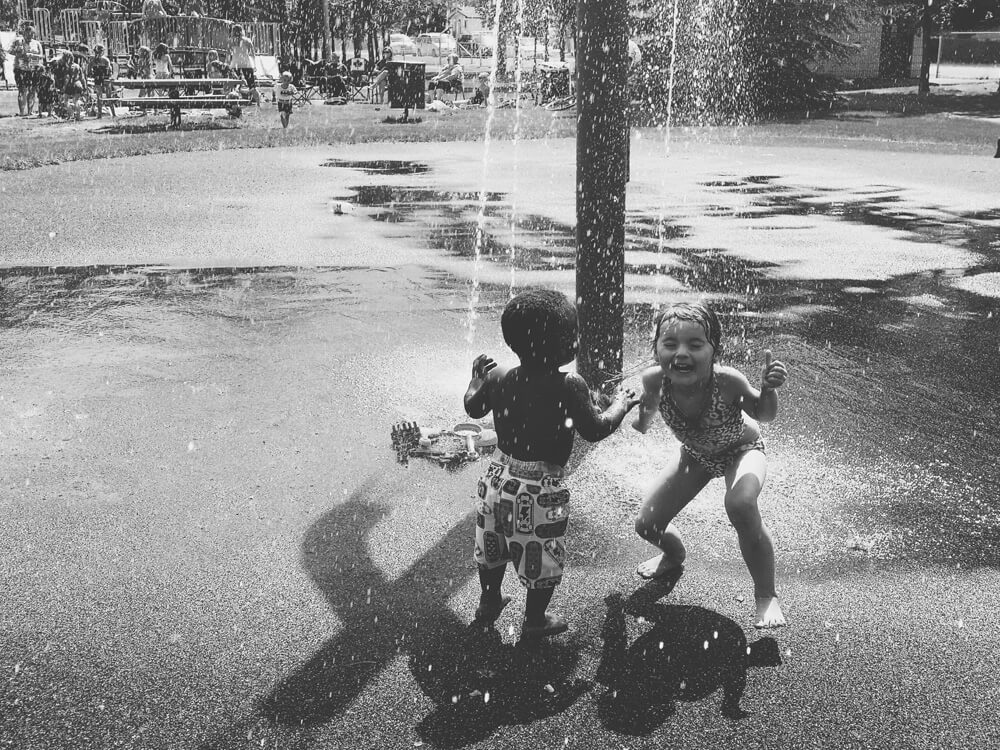
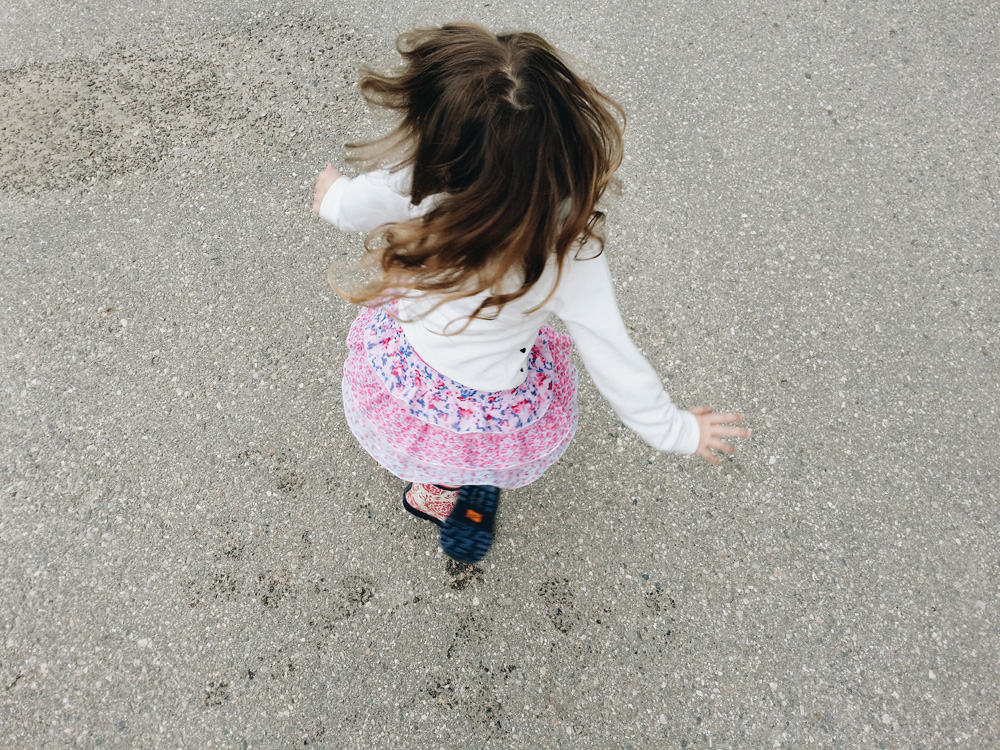
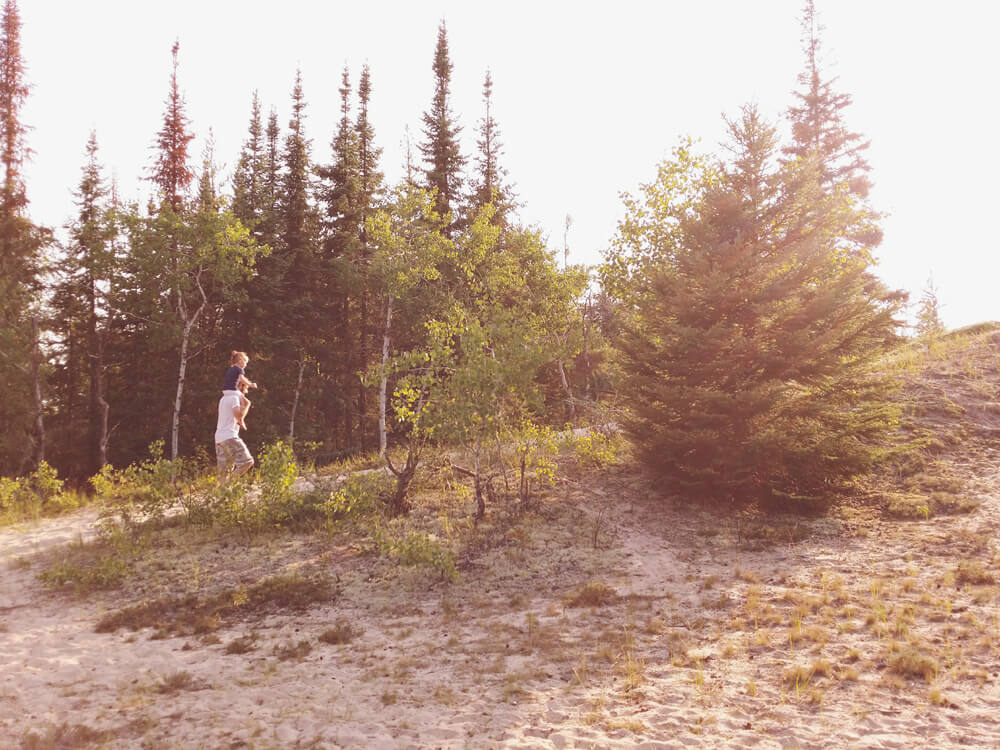
When taking pictures of children I love that zooming out shows their smallness in this big world.

I loved the look of this 50’s diner we stopped at for ice cream on a local road trip, I could have gotten a shot of just her and her ice cream but zooming out and getting the diner in the shot really adds to the whole photo.
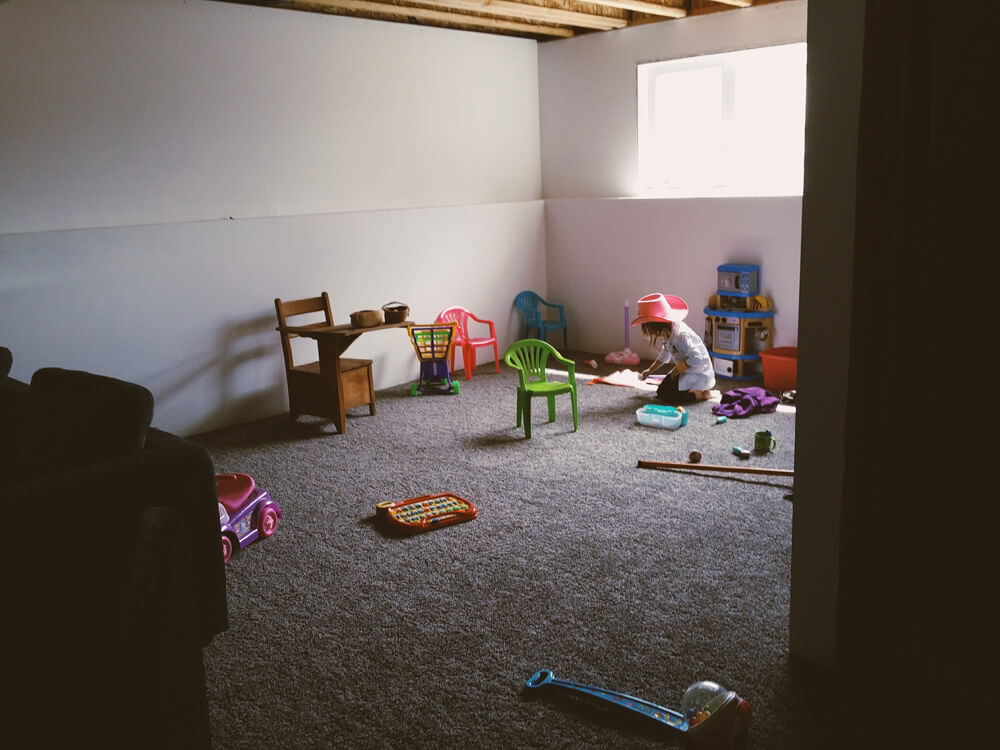
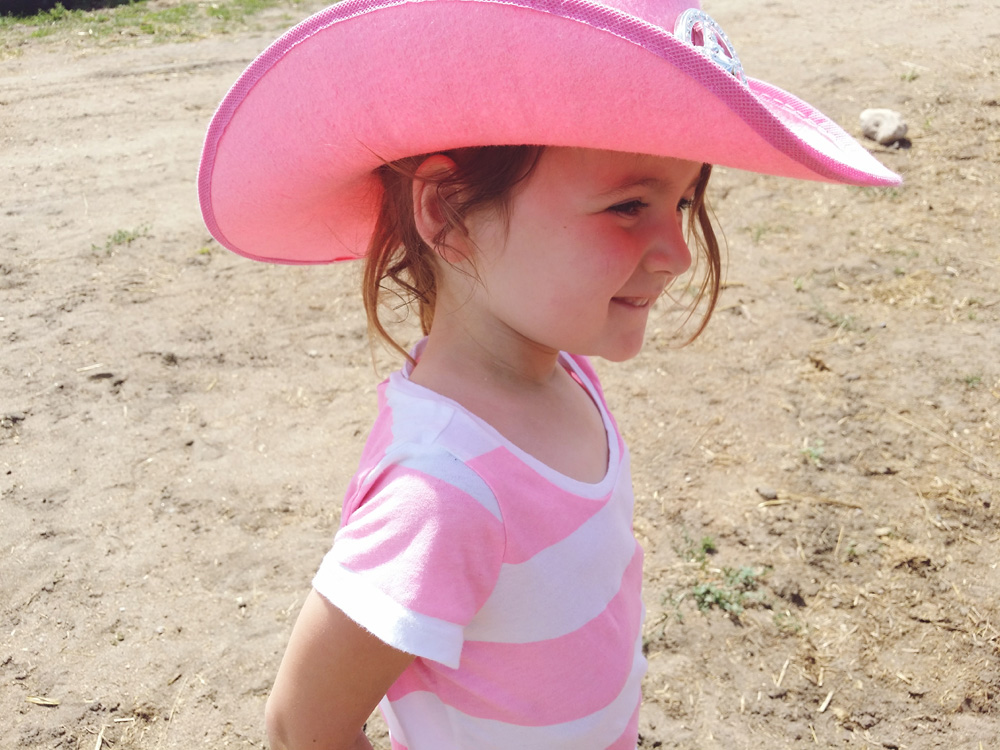
I tell myself that one day I’ll want to remember what toys the kids were playing with and what our toy room looked like. Since I’m such a minimalist that’s hard to imagine right now but I know the years will go by quickly and I’ll love photos like this. My little cowgirl doctor.
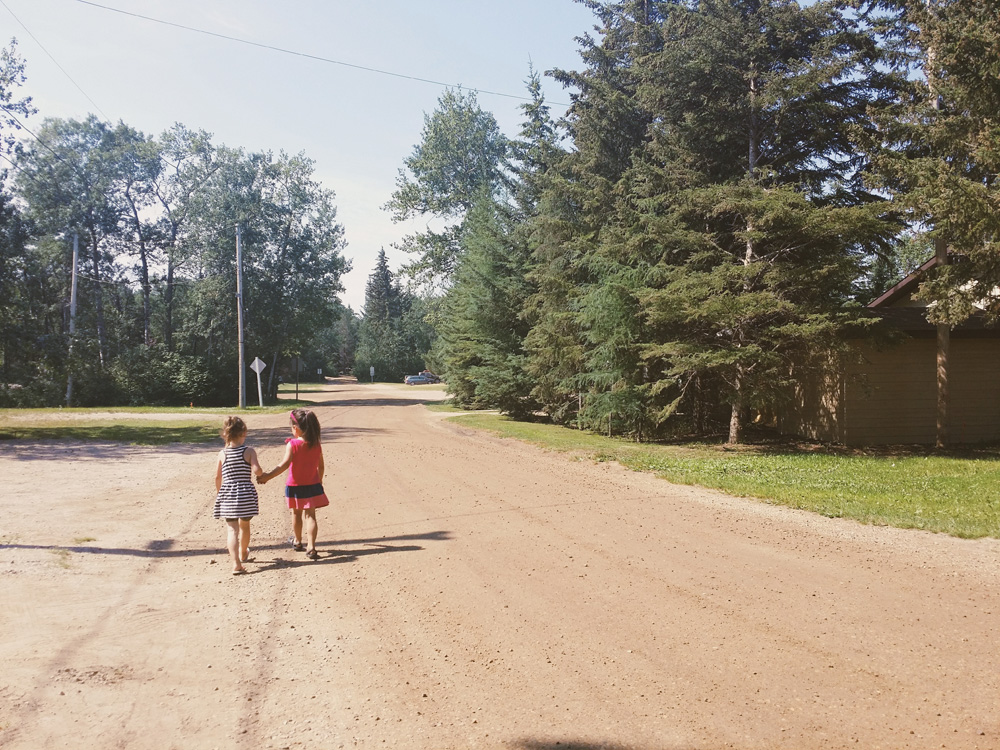

In the two photos above I love how little they look in this big world.
EMBRACE LIGHT AND SHADOWS
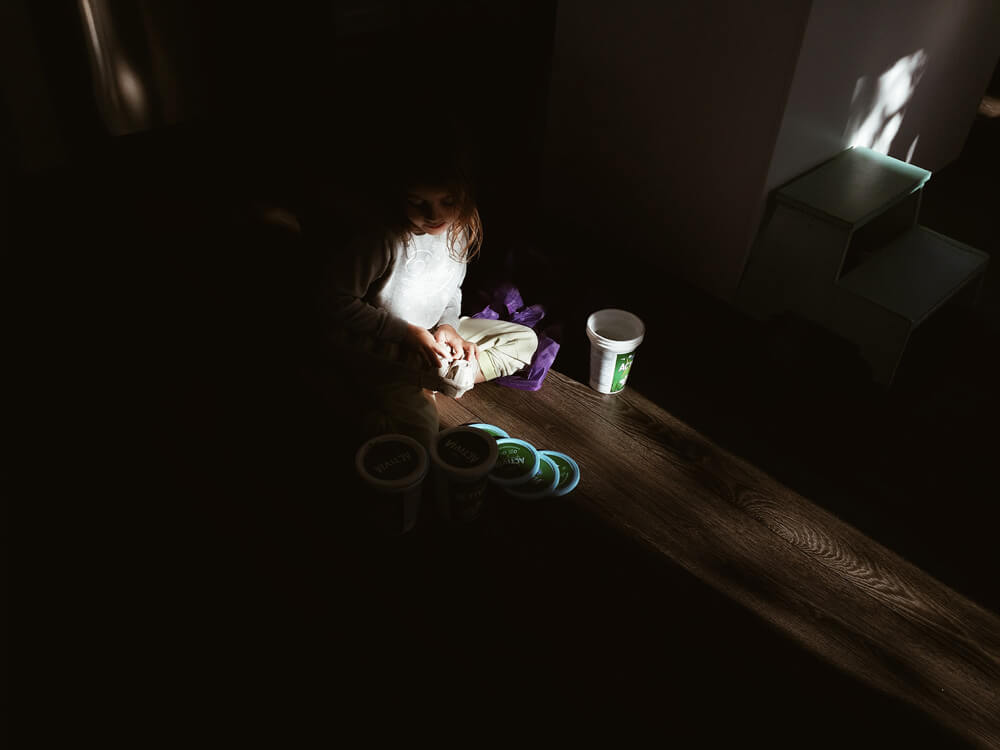
Using both light and shadows in your photos can serve a multitude of purposes like bringing the focus to an object, give a mood to the photo or even give the viewer an idea of the time of day the photo was taken at.
I took this photo early one morning after the light was just starting to stream through the window:
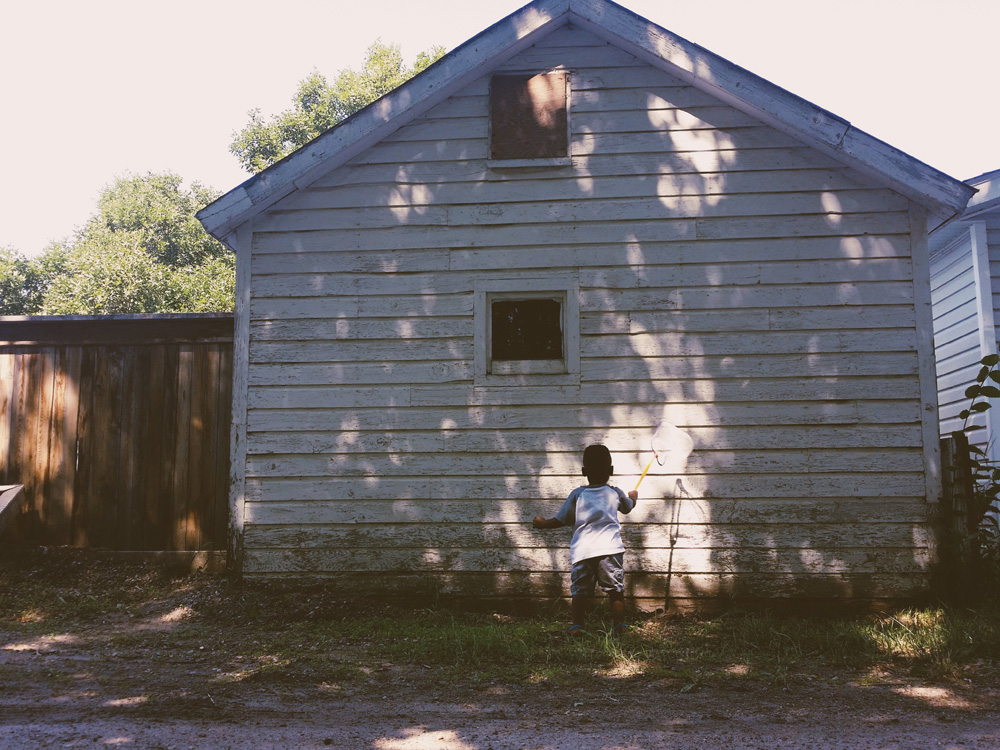
This photo was taken mid-day, I just held my phone up as high as I could and snapped a few shots, I wish I would have gotten the full butterfly net in the photo but I love that I captured such a great shadow and you can see the full net in the shadow. I also like the added interest of the shadow from the trees. When shooting so high above it is hard to know what you are getting, sometimes it takes a few shots before you actually get a good one.

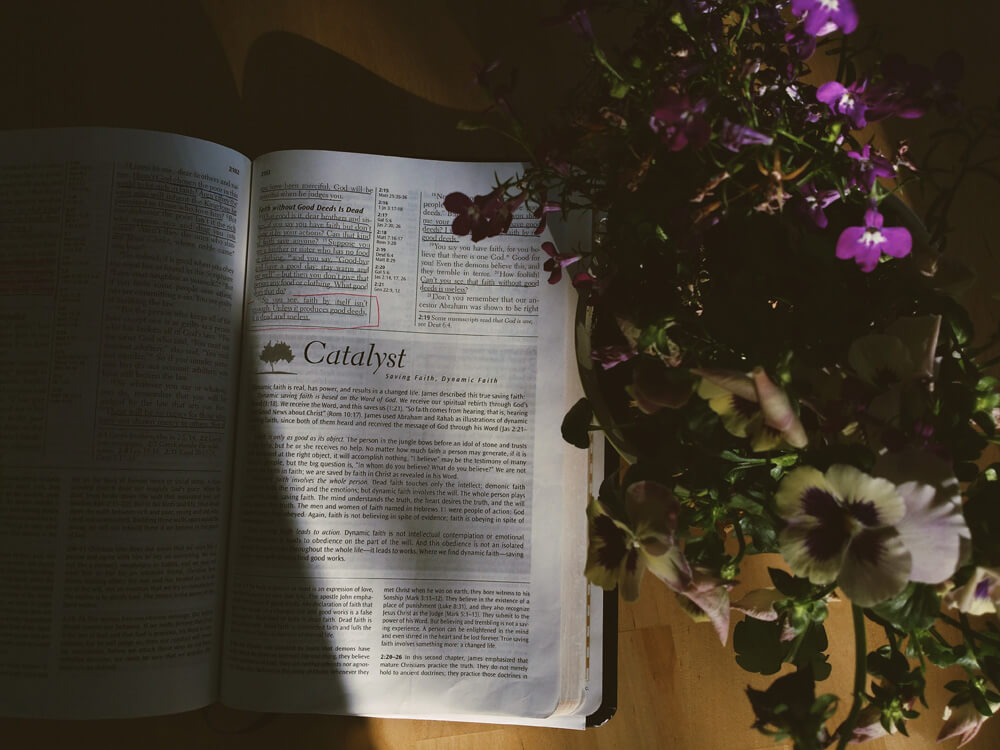
The sun streaming through this morning window perfectly highlighted the passage in James I was reading one morning.
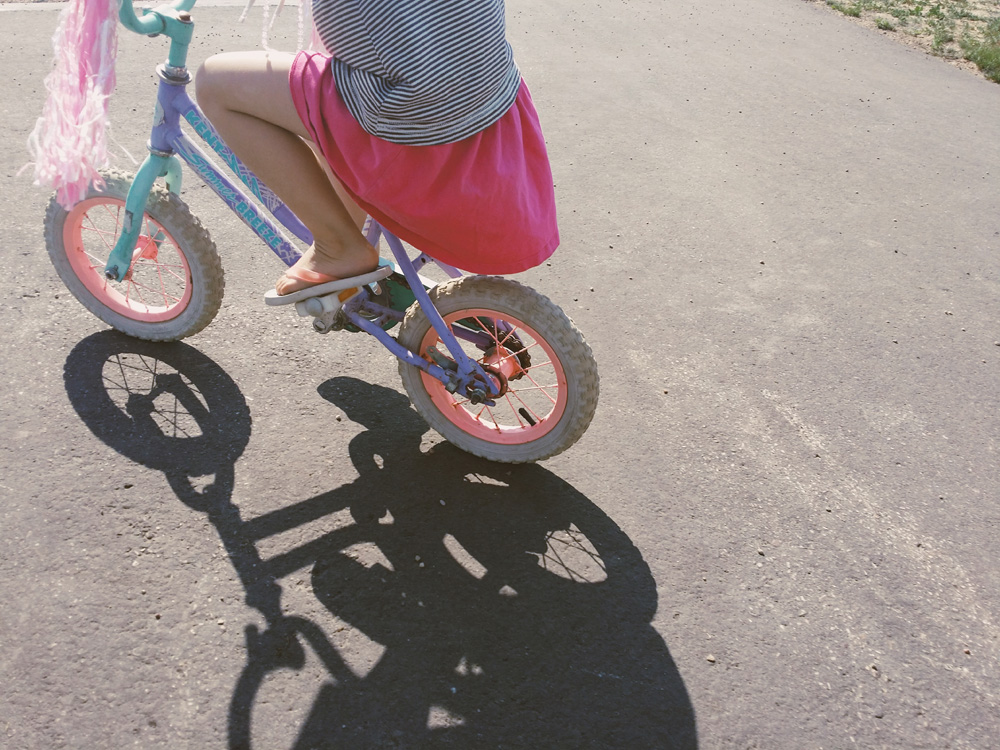
I love how the shadow of her bike adds dimension to this photo.
The sun flare in this shot gives me the same sense of happiness as when I took the photo and they were enjoying the first smoothie popsicles of the summer.

CAPTURE THE DETAILS
There are a lot of details through each day, and even though at the time we are sure we will never forget them, the unfortunate truth is, we will. Over the years, the details will slowly fade, and that’s a great reason to capture them now.
It’s important to note that if you are zooming in for your detail shot, make sure you are just moving your camera closer to the detail, do not zoom in on the camera itself, otherwise you will lose a lot of quality in your photo. Once you take your photo if you decide it still needs to be zoomed in more you can do so in an editing app, that will end up being a much better quality than using the zoom in your camera.
There are so many details I love in this photo, her counting her money (she’s saving for a horse), the rainbow nail polish, the cute little bracelet and the bathing suit that she likes to wear randomly even on days she isn’t swimming.

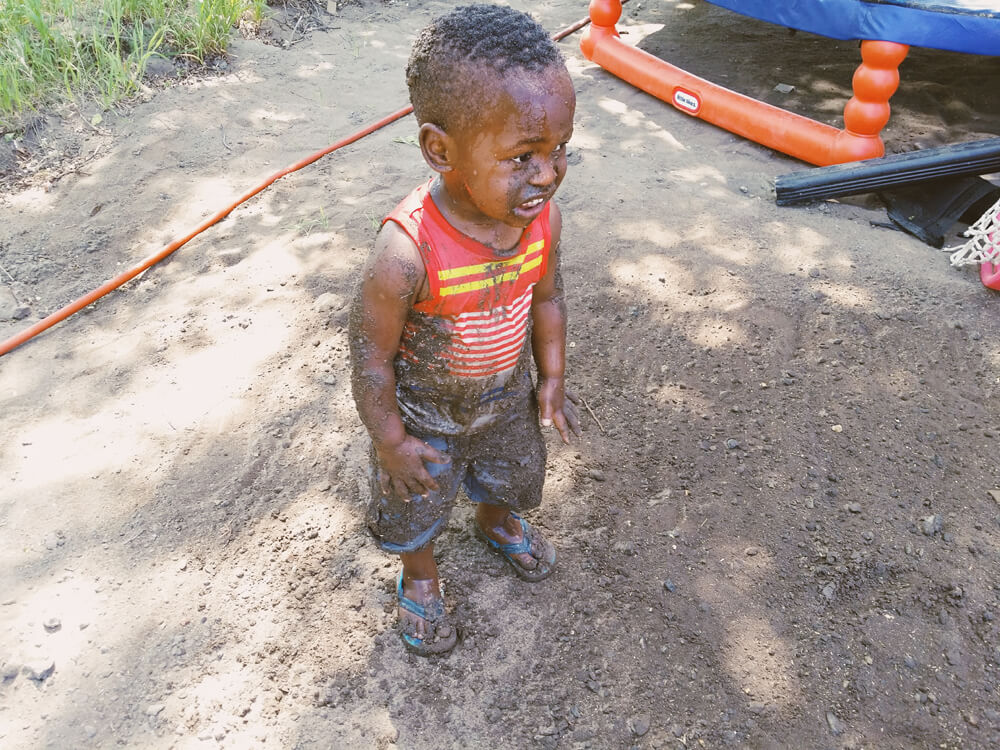
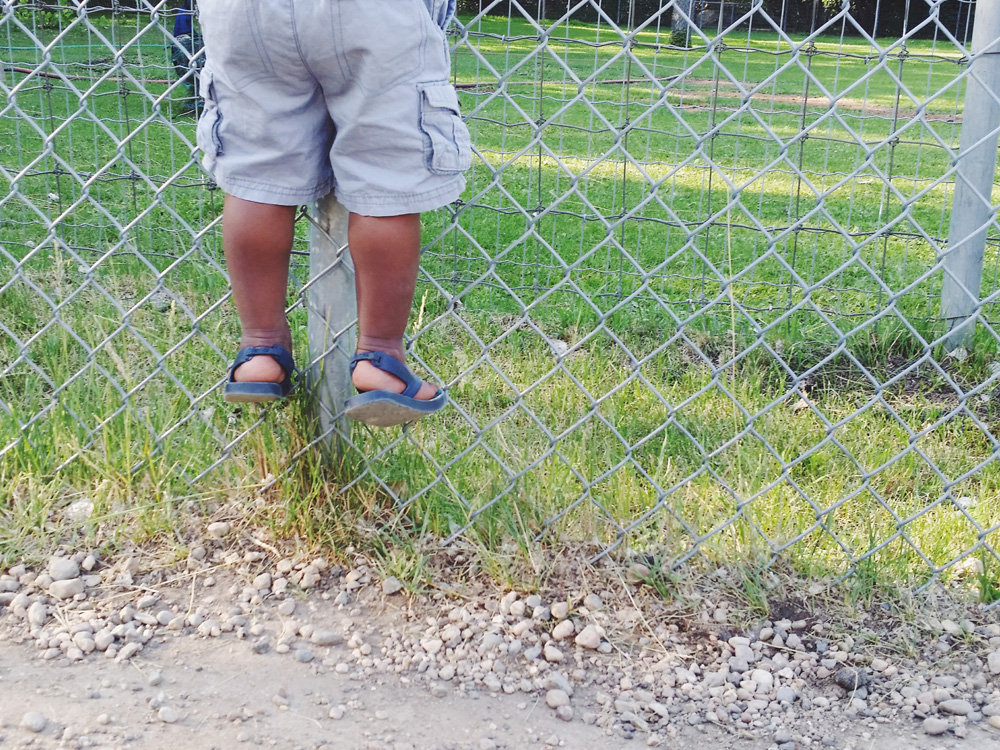
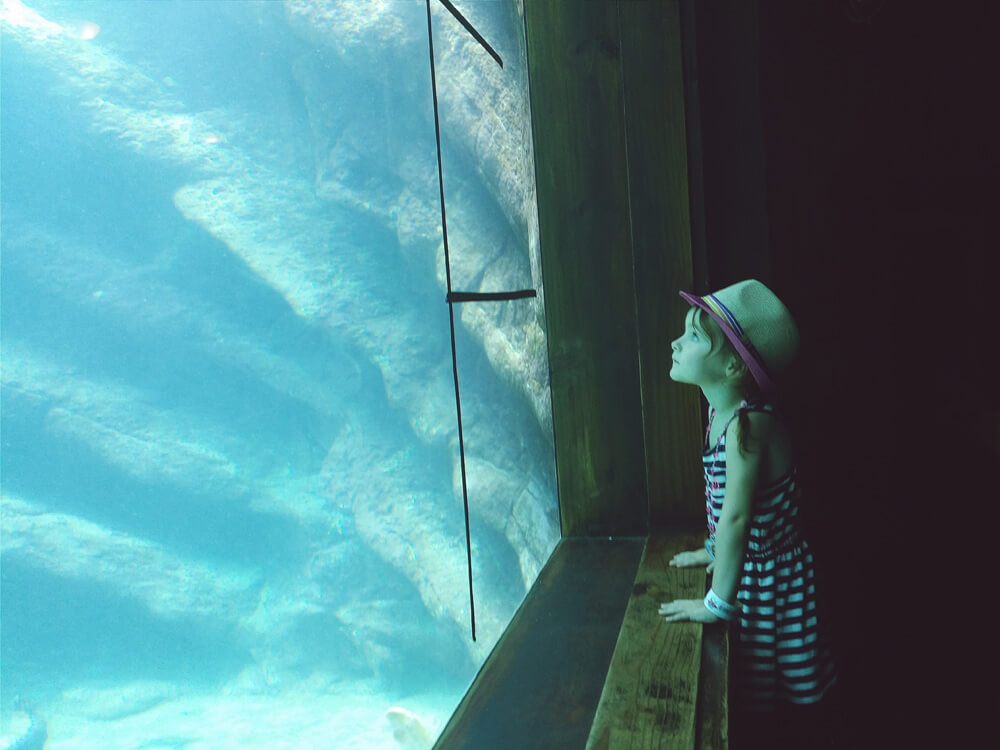
This boy might be a little vertically challenged, but his nickname wasn’t “the determiner” for no reason, this day at the zoo he made sure to find a way to see all the animals.
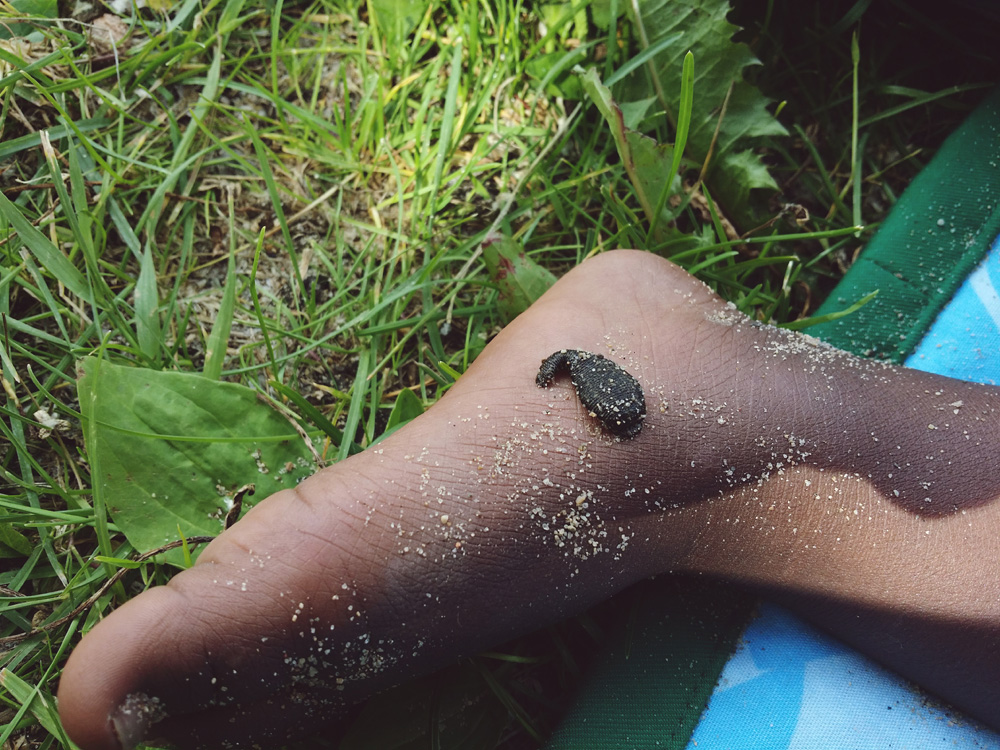
Admittedly, this is a gross detail to remember. But we were at the lake for a week and no one else got a leech on them except this little guy, that’s just his kind of luck. Though, in all fairness his sister did get one at the lake the year before and I photographed that one as well.
TAKE THE SAFE SHOT
I enjoy taking risks sometimes but when it comes to photographing a special moment I prefer to play it safe. For me playing it safe involves starting with the safe shot. If I see a moment I want to capture and ideally I’d like to get much closer to the subject or get a better angle what I’ll usually do is take a shot from where I am at the moment, that’s my “safe shot”. Then I’ll set the shot up how I want it, getting closer or getting that better angle, sometimes I’ll take a few more safe shots as I’m getting closer to the one that I want. Sometimes during this process the moment is ruined and I never get the photo from the angle I was seeing in my head but I have a few safe shots to look back on and see if I got anything good. And then other times it will continue to work for me and I will end up with the shot that I was going for.
I’ve found this to be a great method when I want to take photos of my kids when they are sleeping, I take my first shot in the doorway (with the shutter sound off) and then take a few more shots as I take a couple of steps closer to them. Then, assuming they haven’t woken up, I position myself how I need to in order to get the shot that I see in my head.
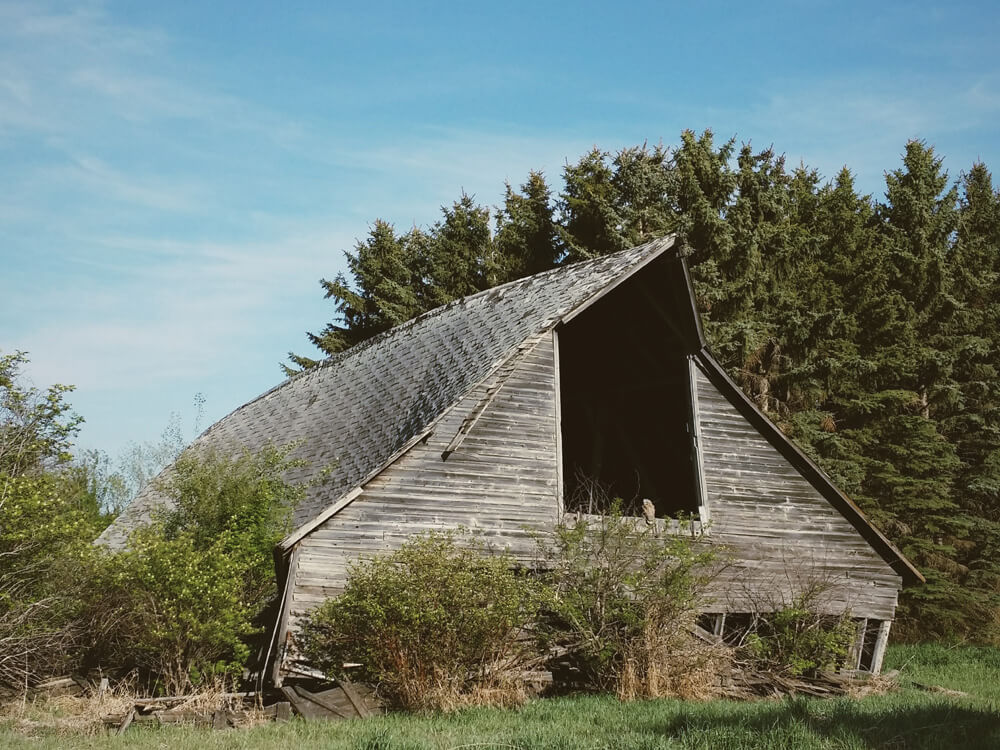
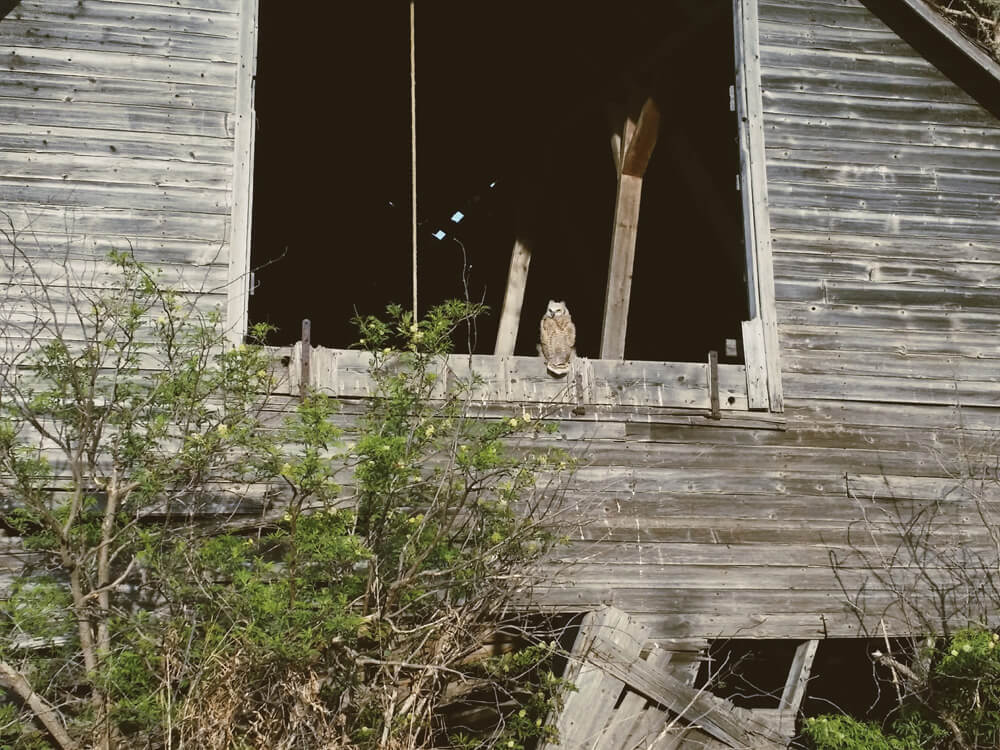
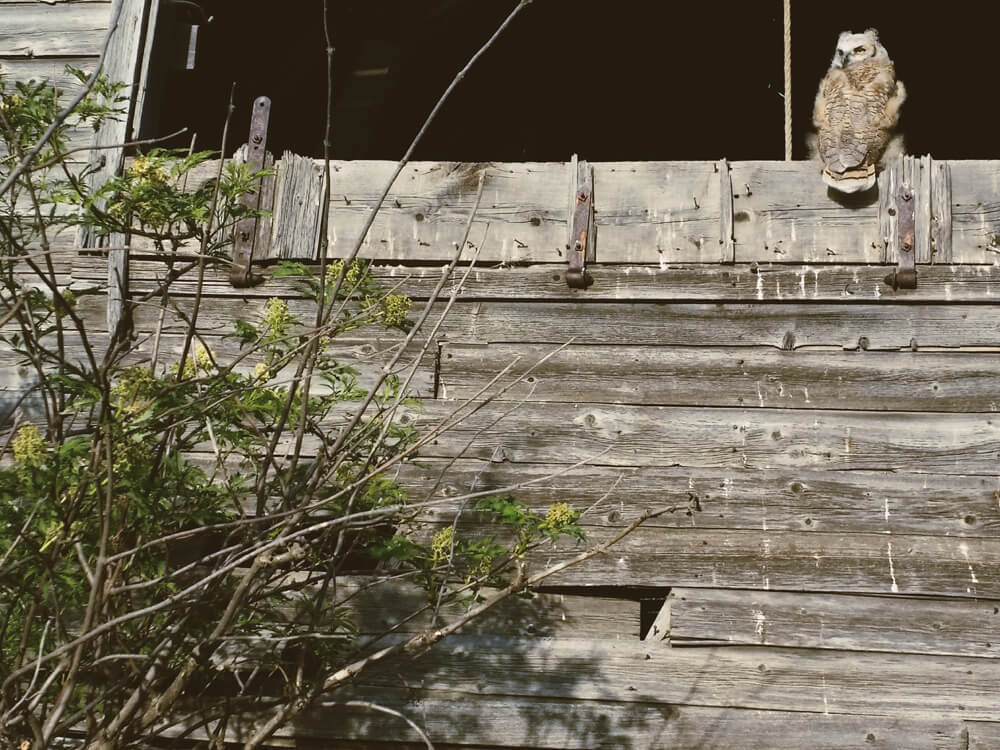
The shots below are a great example of getting the safe shot. We were out in the country getting our family photos done and the entire time this owl was sitting on the old barn watching us. I knew I wanted to capture him much closer up but I wasn’t sure if he would just fly away so I started with a shot before I started walking towards him, then as I got closer I took another, and eventually I got another and got almost right under him before he flew away.
CROP IT
Sometimes you can capture a good shot and all it needs is some cropping to turn it into a great shot. Sometimes you might be cropping something out and other times you might be cropping to get in closer.
For this photo I loved the expression on her face but I felt you couldn’t really tell it was a happy expression until the photo was cropped to get a little closer.

EMBRACE BLUR
For a long time I viewed blur as an enemy that was not to be given any space in my photography. While you don’t want every single one of your images to have ghost-like qualities I have learned to embrace and even love blur on a few occasions.
With a DSLR it is easy to choose to have, or not have, blur by changing your shutter speed but not so with your phone. Blur is something that will often be a surprise instead of a plan but in most instances – embrace it!
You will usually find that blur occurs most often when there is movement in low lighting situations, like nearing the end of the day or in a darker room.
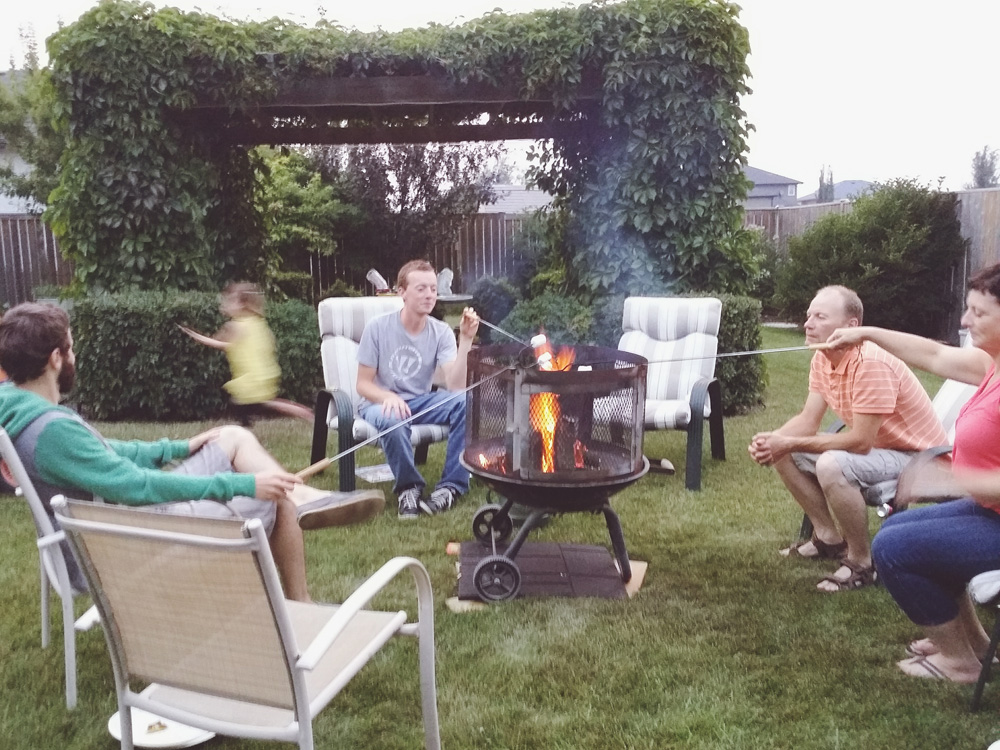
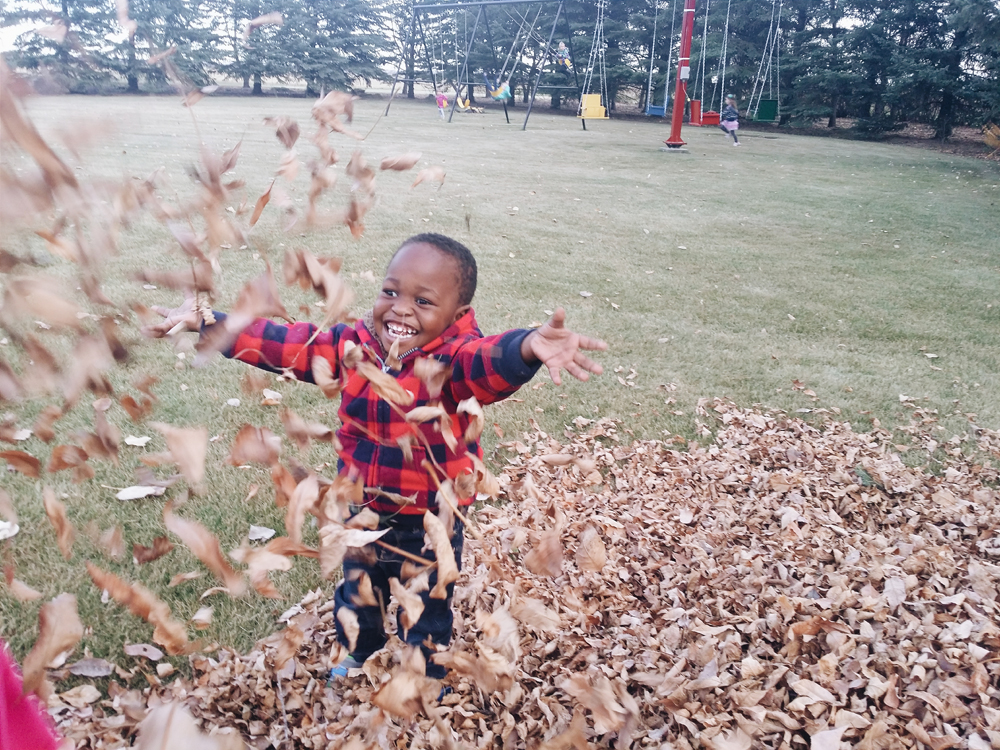
I love this accidental capture of blur – we were sitting around having a nice little fire one evening while Raeca ran a few laps to burn some energy, I didn’t intend for her to be a blur I love that it shows her movement while the rest of us relax.
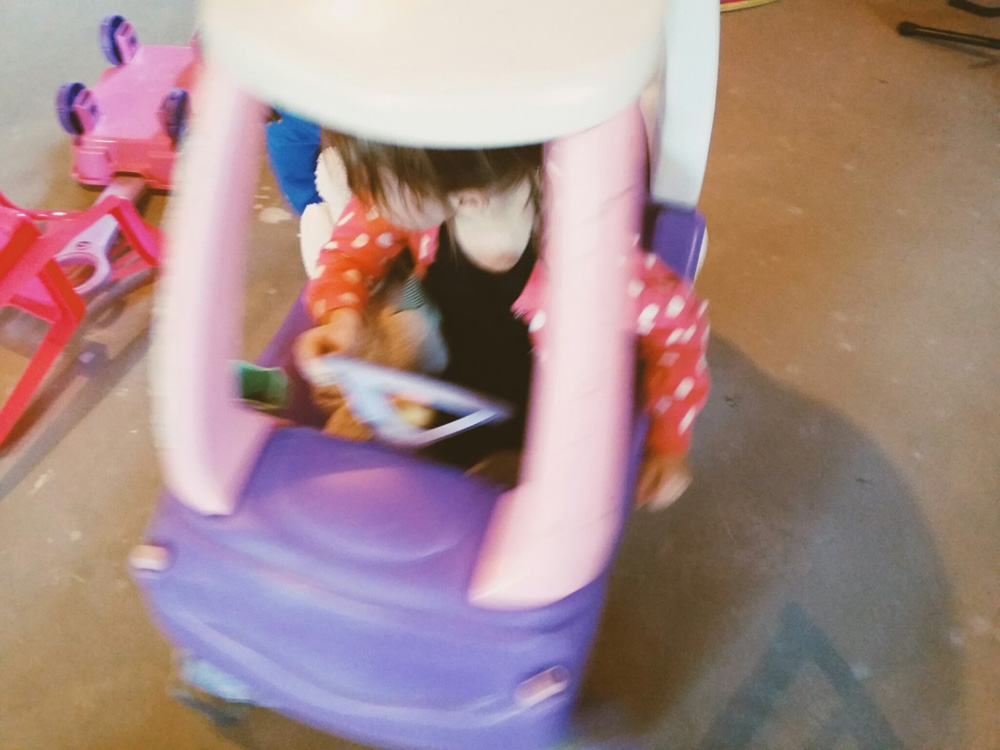
Here Raeca was driving her car in the basement during the winter, a very low light situation, plus she was trying to drive quickly before her brother would catch her.
The blur in this photo reminds me of his excitement to have his sister off at a birthday party and he could spend the afternoon playing with all her toys, and she couldn’t stop him.

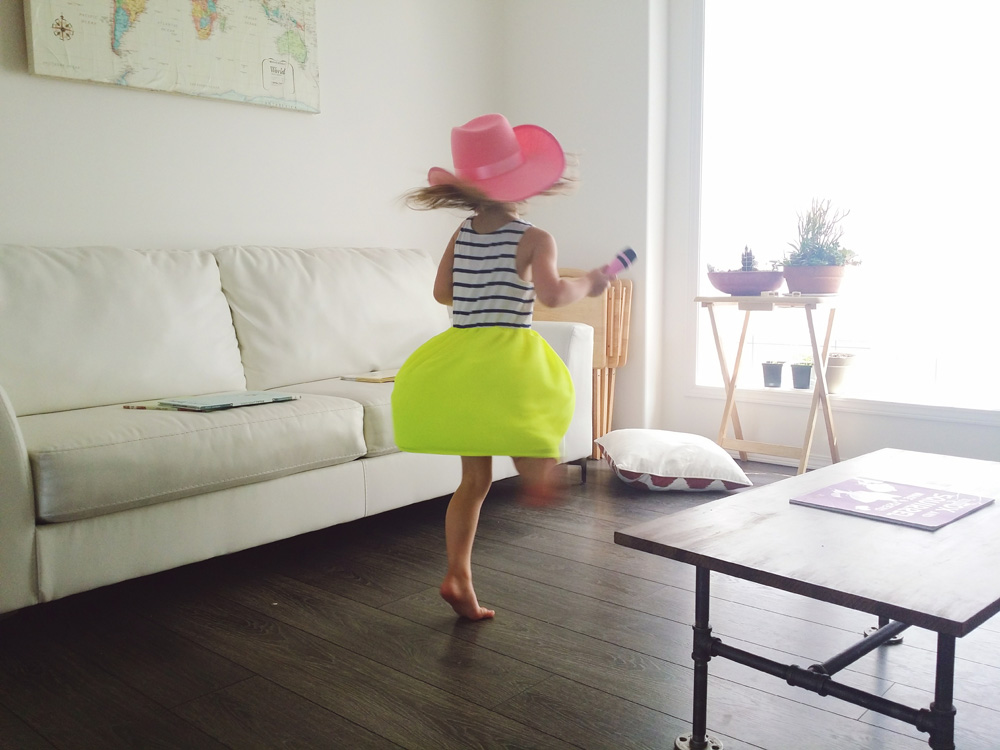
She is so often singing and dancing, one day our house will be quiet and still and I’ll look back on these moments.
FIND DIFFERENT ANGLES
Finding different angles is a great way to bring variety and visual interest to your photographs. Try taking photos from below, above, at eye level or even through everyday items. It’s for just this reason that I never wore a dress when I was photographing weddings, I never knew when I’d be climbing trees or laying down in the dirt.
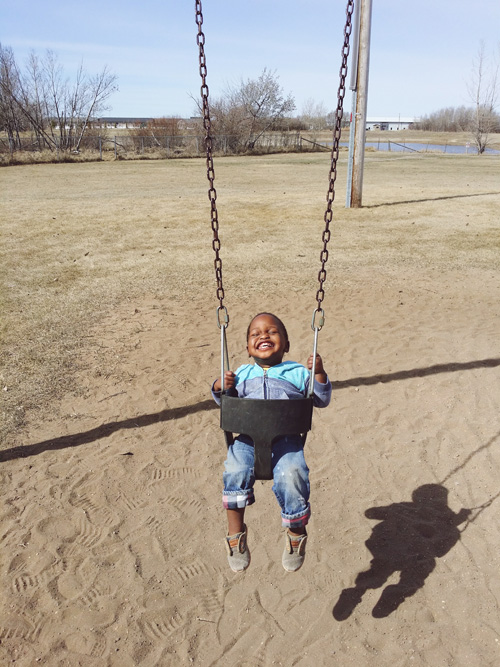
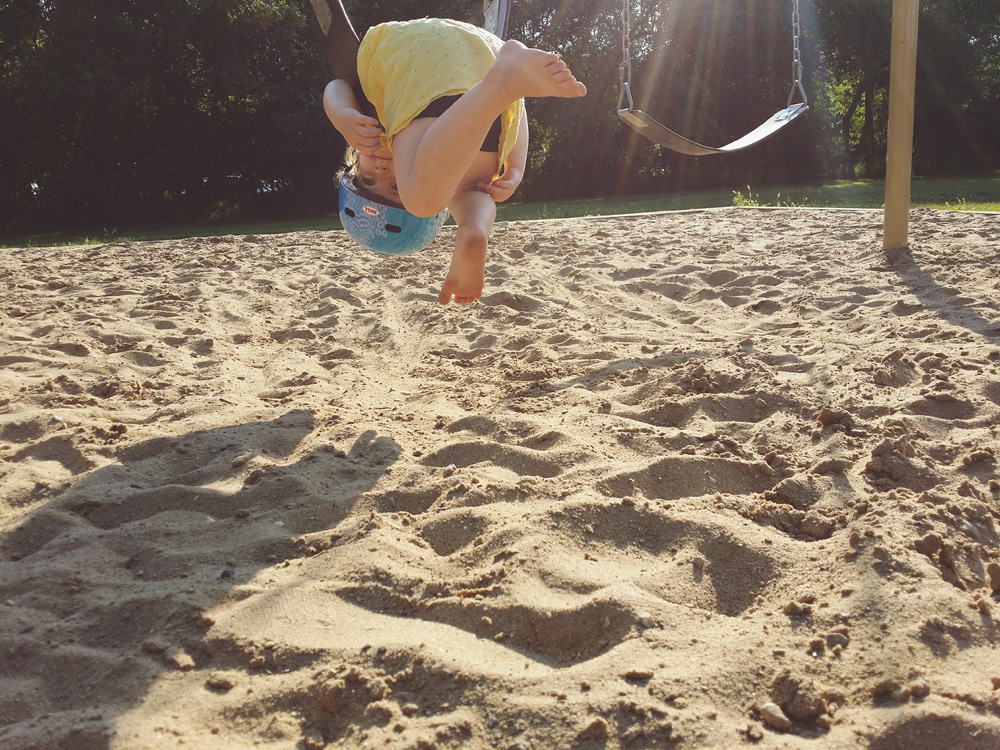
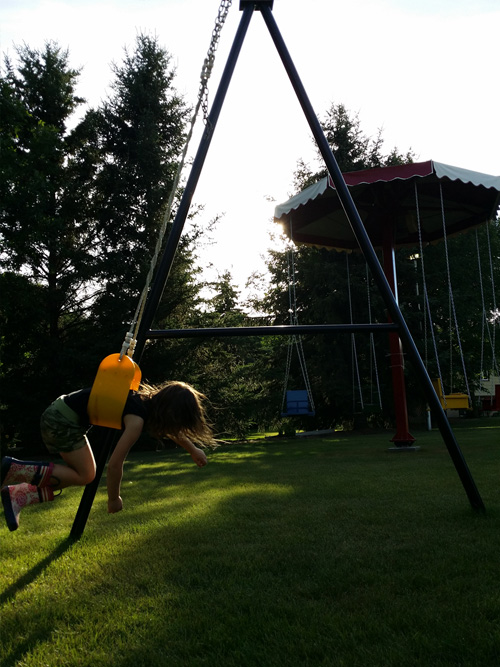
Here I got down on the sand while she was swinging on her stomach, I love that this angle allowed me to capture her face, something I wouldn’t have been able to do had I taken it from above.
For this shot I was pretty much resting my phone on the table and took a photo of her through the legs of the horse. Since my phone was so close to the table and the doll it blurred those items out a bit which helped to keep the focus on Rae.

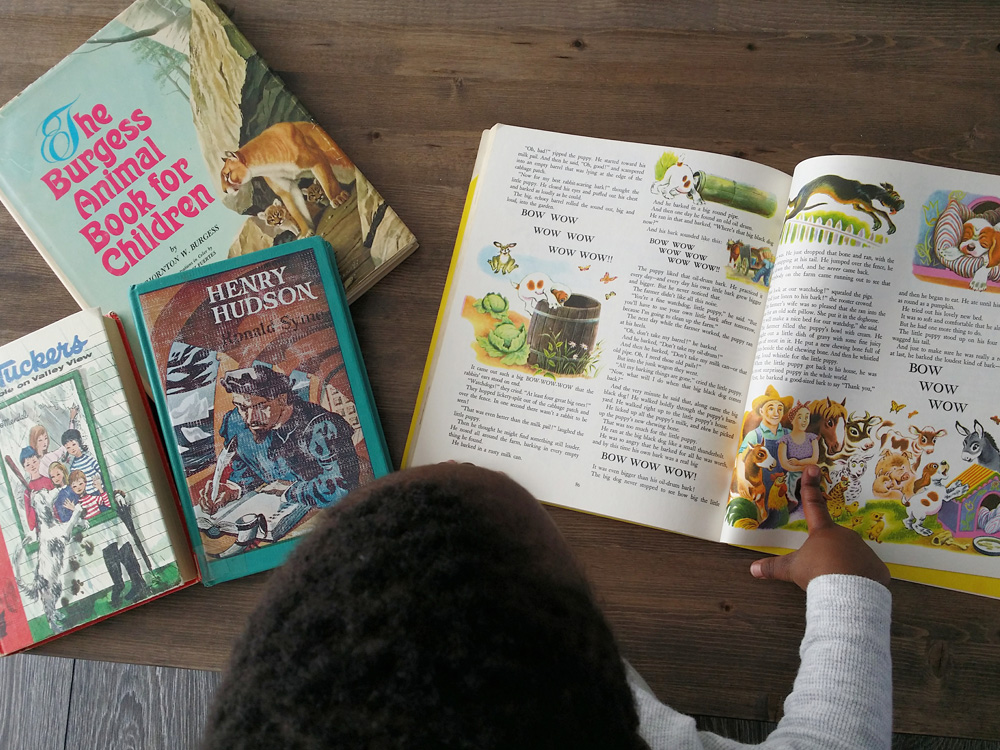
I’m a sucker for photographing book shots from above so I can look back and see what pages they were looking at.
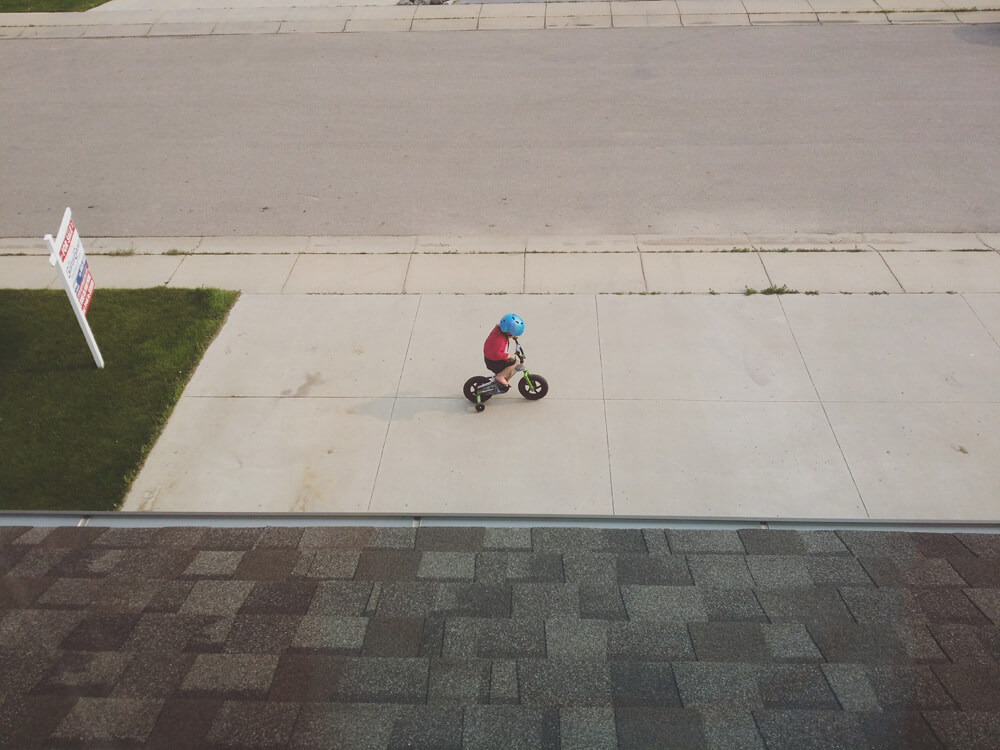
I shot this one from the upstairs in our two-storey window when I was peeking out to make sure she was still biking on the driveway. I love how tiny it makes her look.
ANTICIPATE IT
Sometimes the kids are doing something and I just know there is going to be a good expression coming. In those instances, I get my camera on and ready, frame the shot and wait for the perfect expression or image to come across my screen.
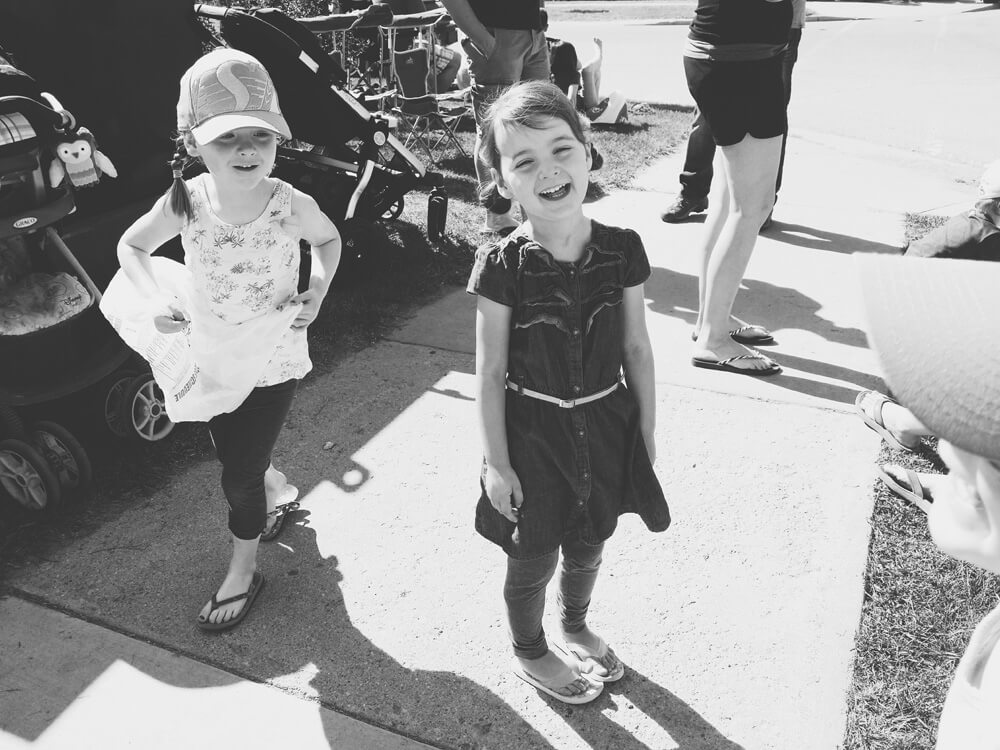
In the photo below Raeca was playing with her cousins and being silly, I knew a big laugh was coming so I pulled out my phone, got my camera ready and waited for it. Sure enough, a few seconds later the laugh came and I got the shot.
I also find myself doing this a lot when we are driving, I’m always scanning the horizon for something of interest to come up on my side of the road, when I see something I hold my camera up to the passenger side of the car and wait for whatever was of interest to enter the frame and then I shoot.
There are also times when I find a great location that I think would make an excellent background for a photo so I’ll frame the shot and then ask one of my kids to walk, skip, run or twirl in that direction. Or I’ll just ask them to go stand there and let them pose however they want.
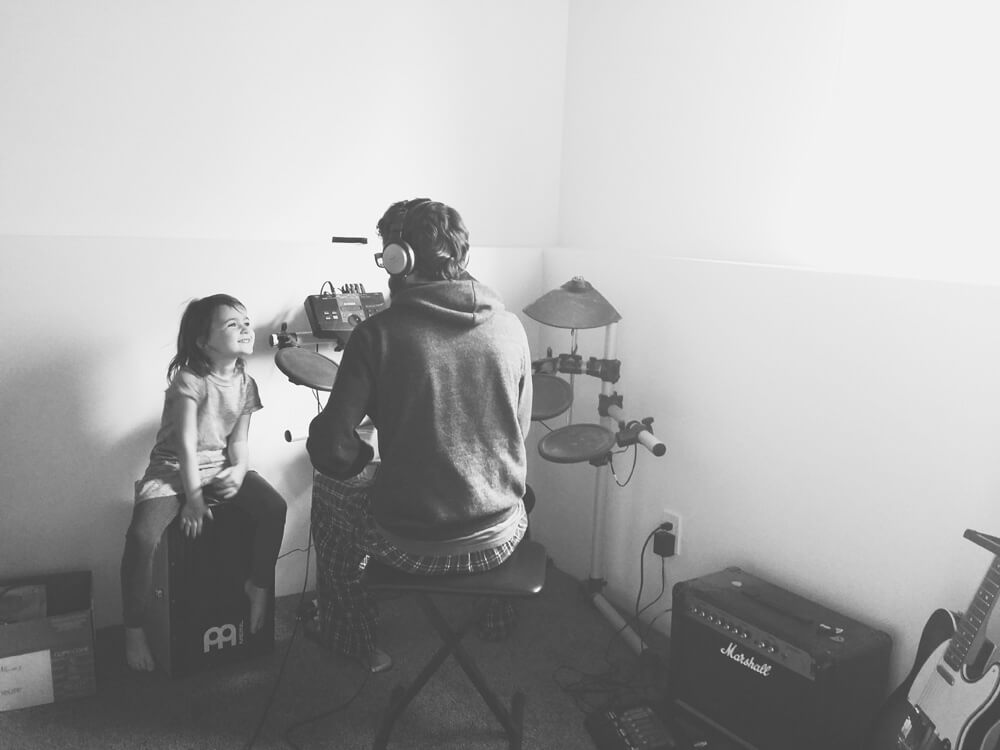
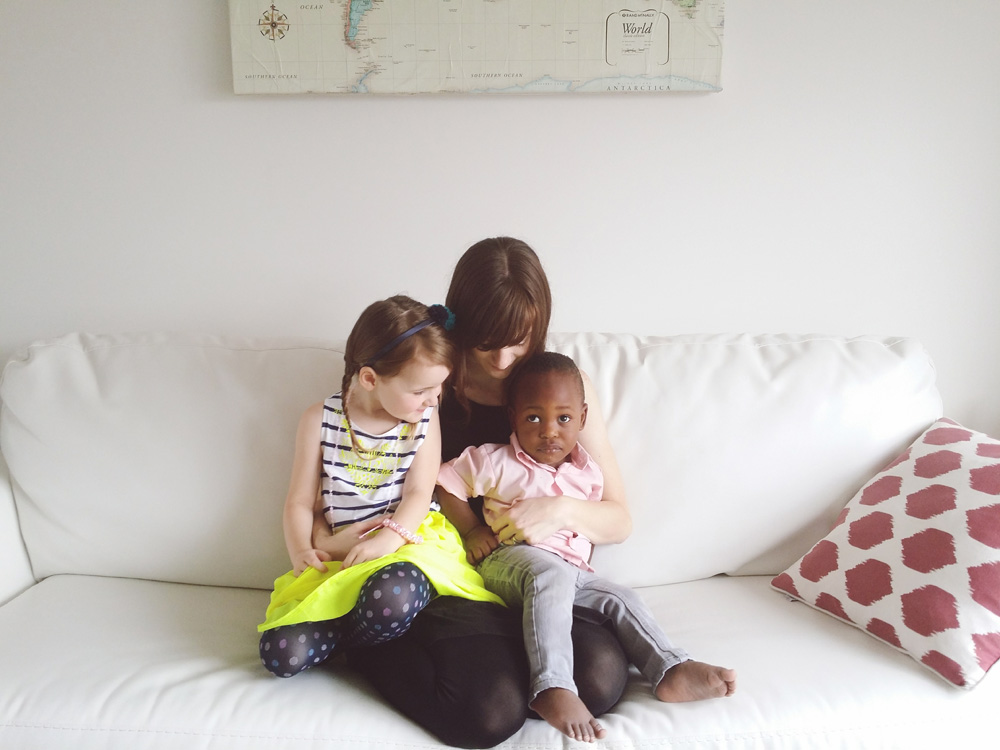
BECOME THE {SILENT} PAPARAZZI
Because I take so many photos my family and rarely ask them to look at me or smile for the family they are pretty much immune to my pictures and I can take photos without them even noticing that I’ve done so (especially if I have my volume off so it doesn’t make a sound). I believe this is actually why my kids do well the very rare times that I do ask them to smile for the camera.
In the photo below I was walking by and saw them jamming out together. Because I had my phone handy I took it out and grabbed a quick shot, all without them even noticing that I had been there. Since they didn’t notice me I was able to capture her genuinely smiling up at him. This is one of my favorite photos of all time.
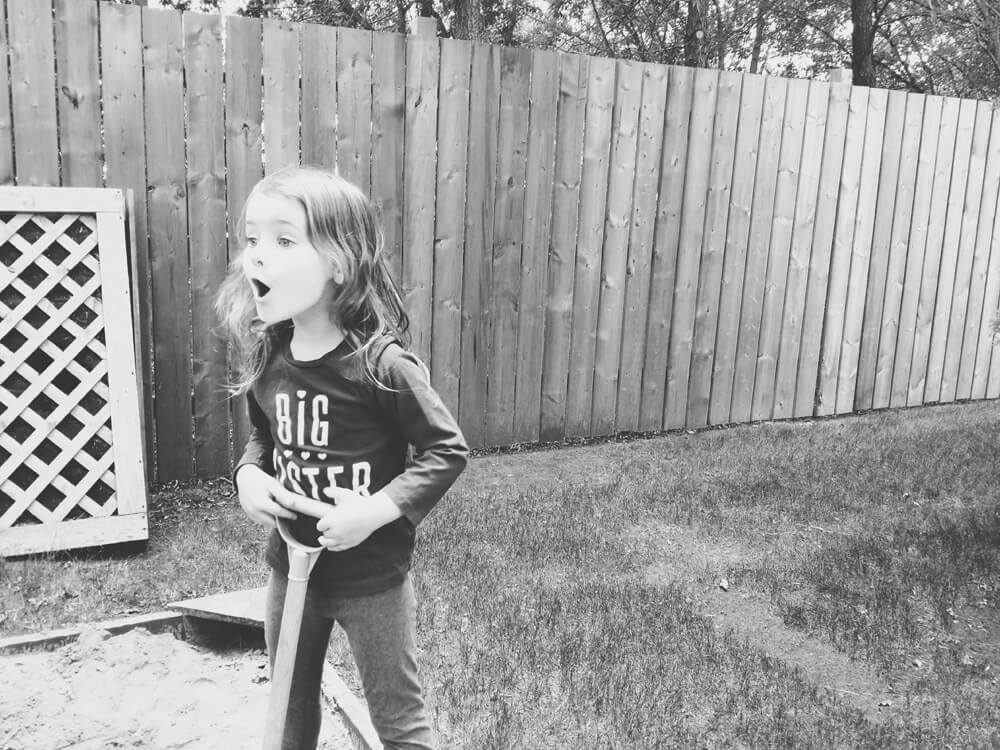
CAPTURE EXPRESSIONS
Expressions are so fun to photograph, because they are often so fleeting I feel really accomplished when I get the shot, and also because children change so much over the years I love having documentation of their different expressions.
I don’t remember exactly why he was crying in this photo but I know it was something minor, I’m guessing this is a trait he will grow out of in a few years so I like to get a few photos like this now.
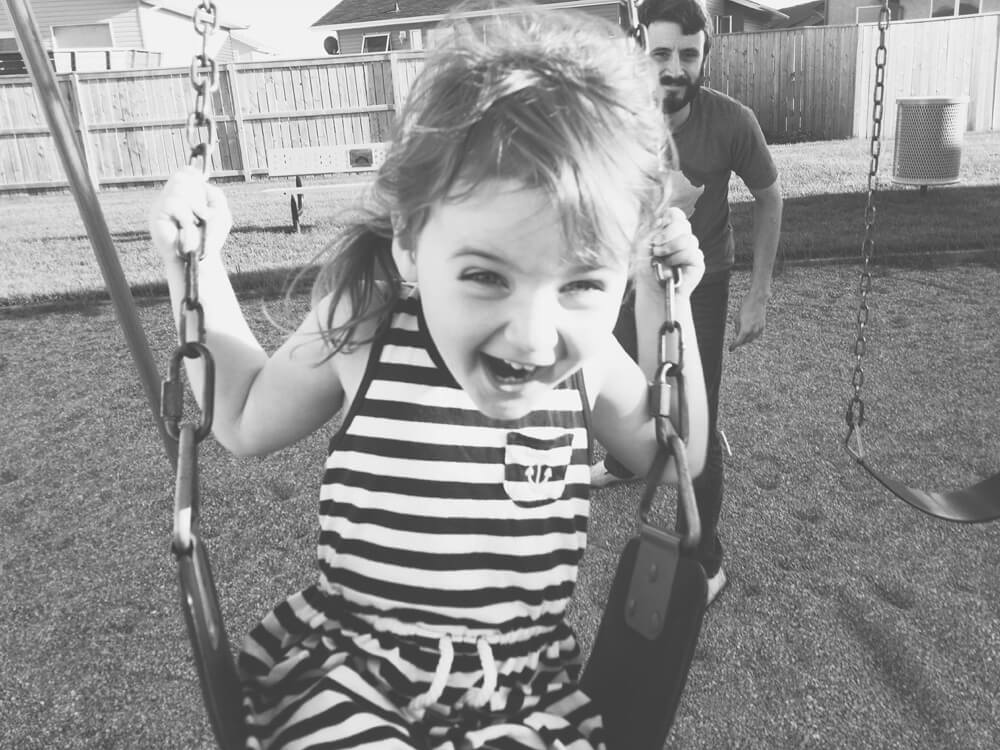
Excited expressions for pretty obvious reasons, are some of my favorite to capture. Having your Dad push you high on the swings is quite the thrill as a child.
She wants to own a horse one day and a few months ago she got a chance to meet one. To me this photo shows a mixture of excitement, admiration and fear (as she realizes just how big horses are).
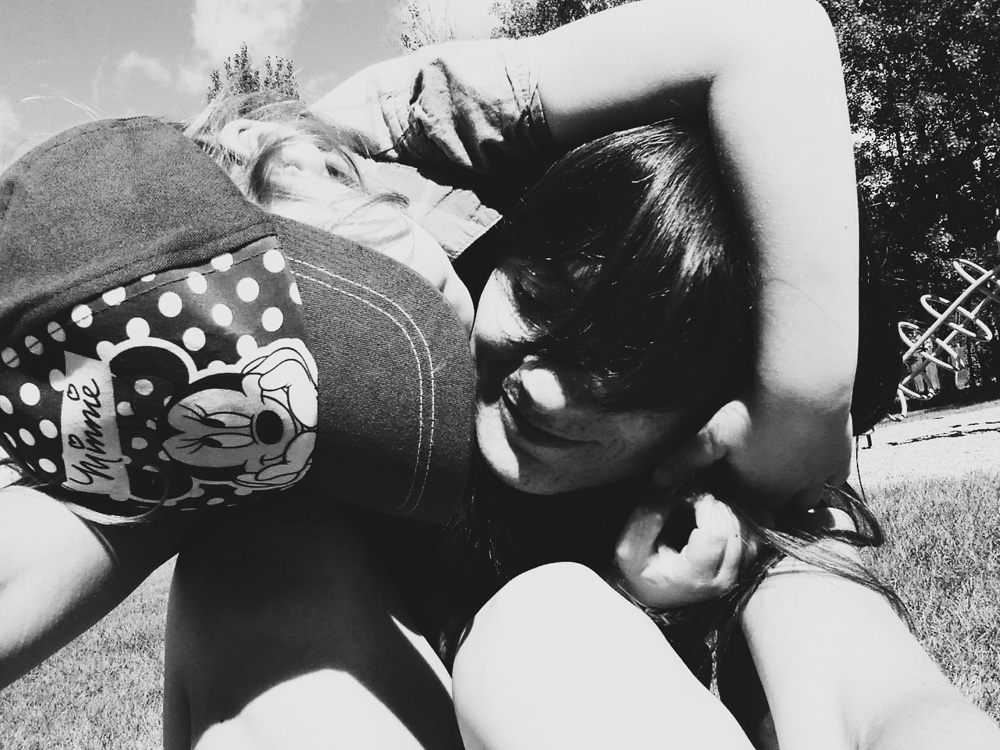
A GOOD PHOTO DOESN’T ALWAYS MEAN A PRETTY ONE
Sometimes I forget that these photos I take are really for my benefit and my children’s. It must be the photographer in me, but I find myself reverting back to thinking some shots aren’t “good enough” because other people won’t understand or like them, but that’s not the point! I am trying to capture my own memories and then truly, a good photo doesn’t have to be one that is necessary a properly exposed one or one that has the right composition.
While this photo is pretty terrible from a technical stand point, as a mother I love the capture of them both sleeping with their heads the same way and to me that makes it a good photo.

Her face is technically to bright in this photo but once again, it’s an image I like because I remember her playing with her cousins and giving orders like foreman (generally not a good trait but I thought it was funny because no one was listening anyway).
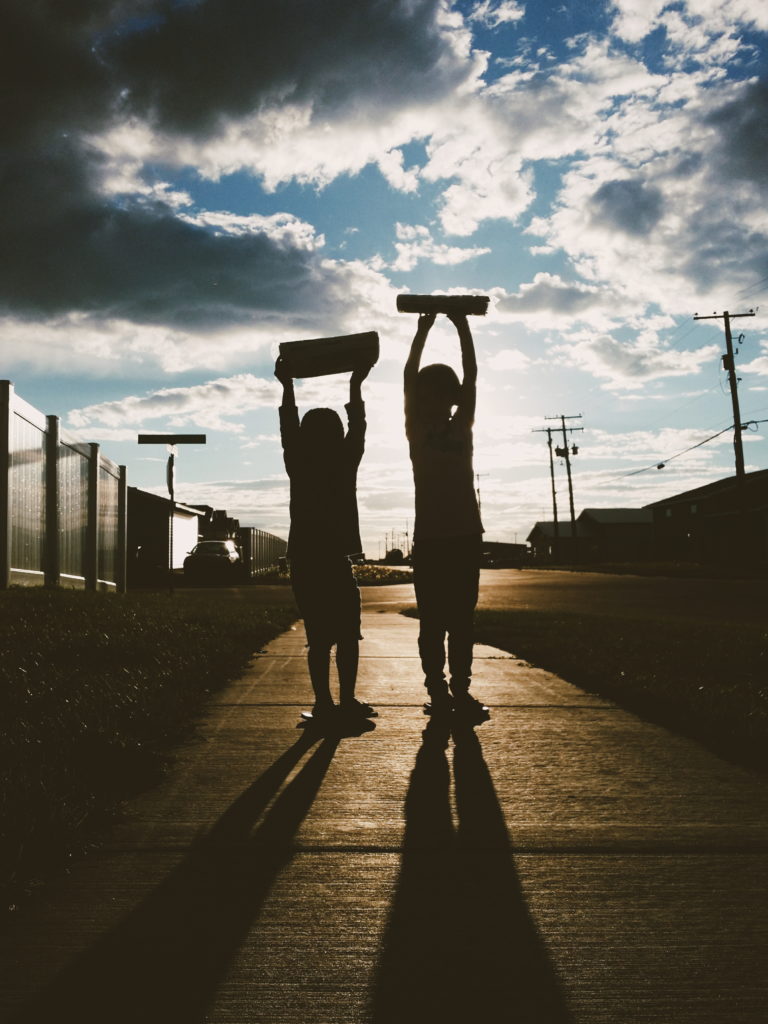
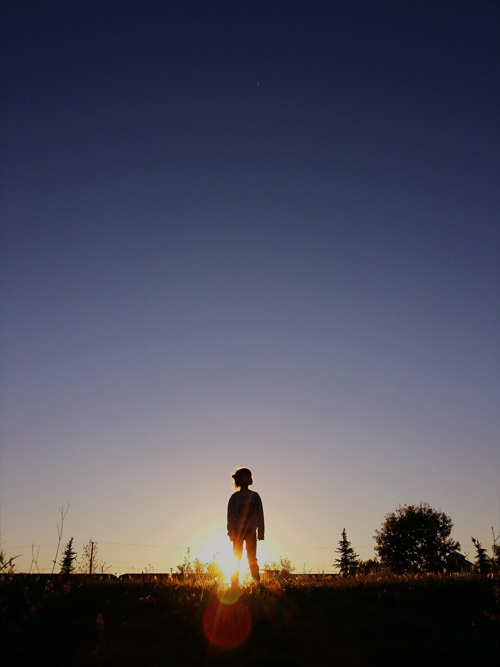
CAPTURE SILHOUETTES
I find silhouettes to be a way to add some visual interest and mood to a photo. Silhouettes occur when the subject is photographed against a bright light, such as the sun, and then you expose for the brightness of the background and not your subject.

Here are some tips on making sure you get the best silhouette photos possible:
#1 MAKE SURE THE LIGHT IS BEHIND YOUR SUBJECT
To create a silhouette you need the sun or whatever your light source is to be behind your subject.
#2 TURN YOUR FLASH OFF
If your flash is on it will end up brightening your subject, the exact opposite of what you want, so make sure you turn it off.
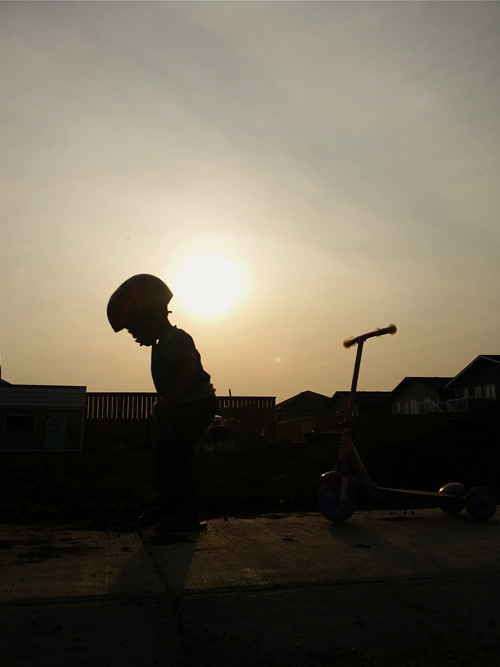
#3 ELEVATE YOUR SUBJECT
One way to do this is to get your subject up on a hill or get your camera down close to the ground.

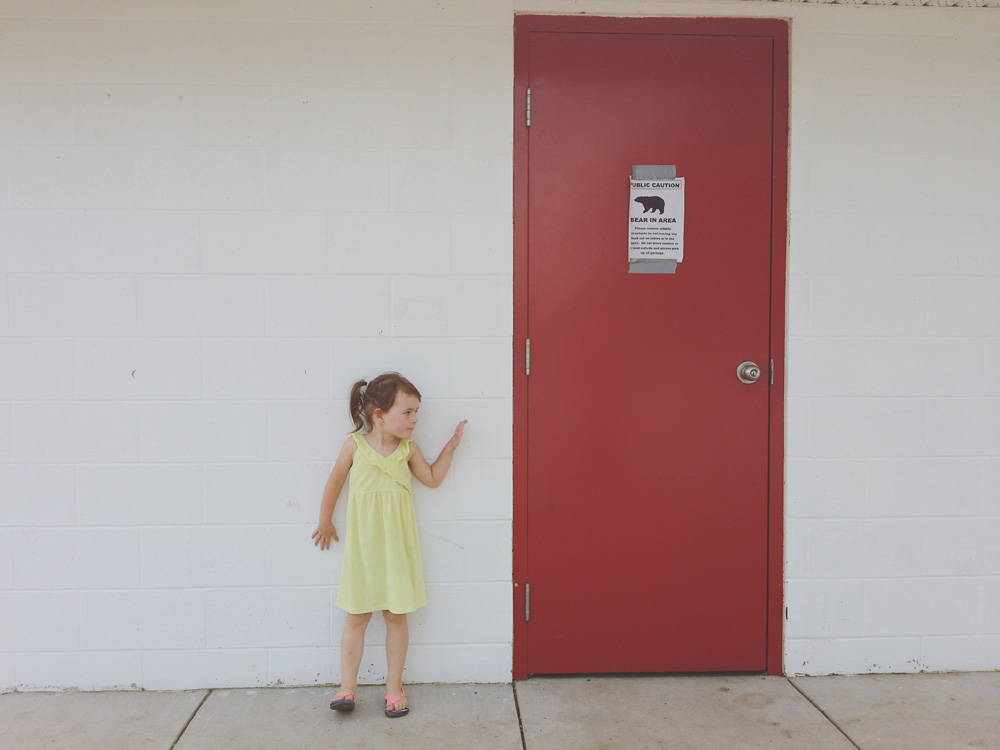
#4 FRAME IT
Use elements in your environment to frame your subject, like buildings or trees for more visual interest.
#5 BURST
If your subject is moving trying using burst mode to get a lot of pictures in a short amount of time then afterwards you can go back and pick your favorite one, or it might even be fun to put a few of them together in a collage to show the progression.
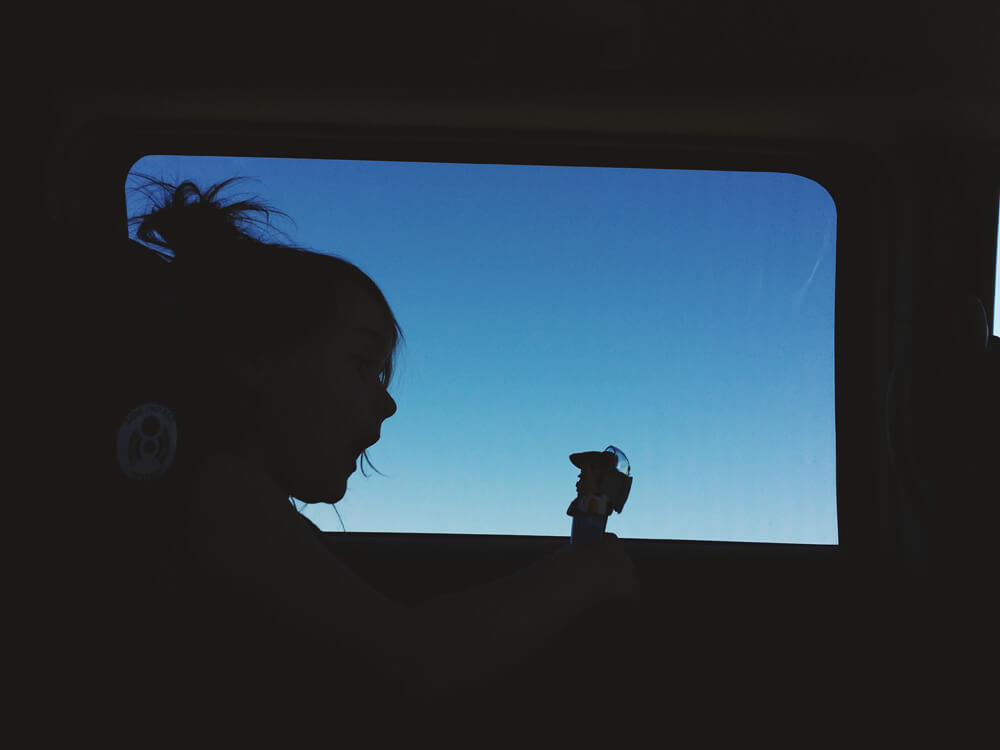
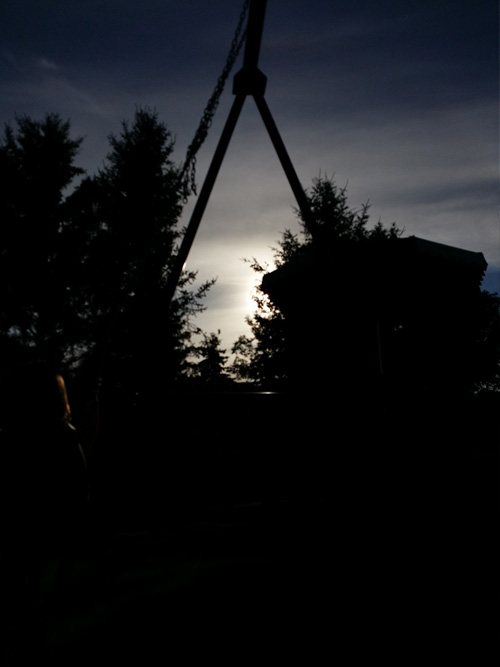
Here we were on a road trip and Raeca was playing with a Pez Woody and Buzz. She has such a great imagination and she was playing with them for a long time, I wanted to document the moment but I didn’t want to include all the luggage clutter, plus the lighting wasn’t that good in the vehicle anyway so I went with a silhouette.
Here I wanted a shot of her being a ballerina but I didn’t want all the visual clutter that would come with a properly exposed photo so a silhouette perfectly suited this photo.
Editing your silhouette photos can help give them that extra pop, my favorite little editing tweaks for silhouettes are:
- increase the sharpness
- reduce the exposure
- increase the contrast
- add a vignette
- reduce the highlights
GET IN THE SHOT
Admittedly, this is the hardest one for me, I’m so used to being behind the camera that I have troubles being in front of it. But I do know that I want there to be photographic evidence that I was around these years too so I’m working on getting in the habit of passing my phone off and being in more photographs. I’ve even realized lately that Raeca can take a decent photo so I’ve asked her to take a few photos of me and Ephraim. Use what you have around you, buy a selfie stick or check out some timer apps, we’ve done that a few times with some pretty good results.

SETTINGS
While a phone camera doesn’t give you the same control a DSLR does, there are still things you can change within your camera to change the photo to look the way you want it to. Here I’ll be sharing a few of my favorites settings and tricks.
CAMERA APPS
When taking photos with your phone you can choose to use the built-in camera or download a camera app that often gives you more control over the photos you take. There are a variety of different apps available for iPhones and Android, each app has it’s own positive features. As an Android user I usually just use the camera built into my phone or on occasion will use the app Camera FV-5 Lite. I have friends who are iPhone users and some apps I’ve heard them recommend are Camera+ and ProCam 2.
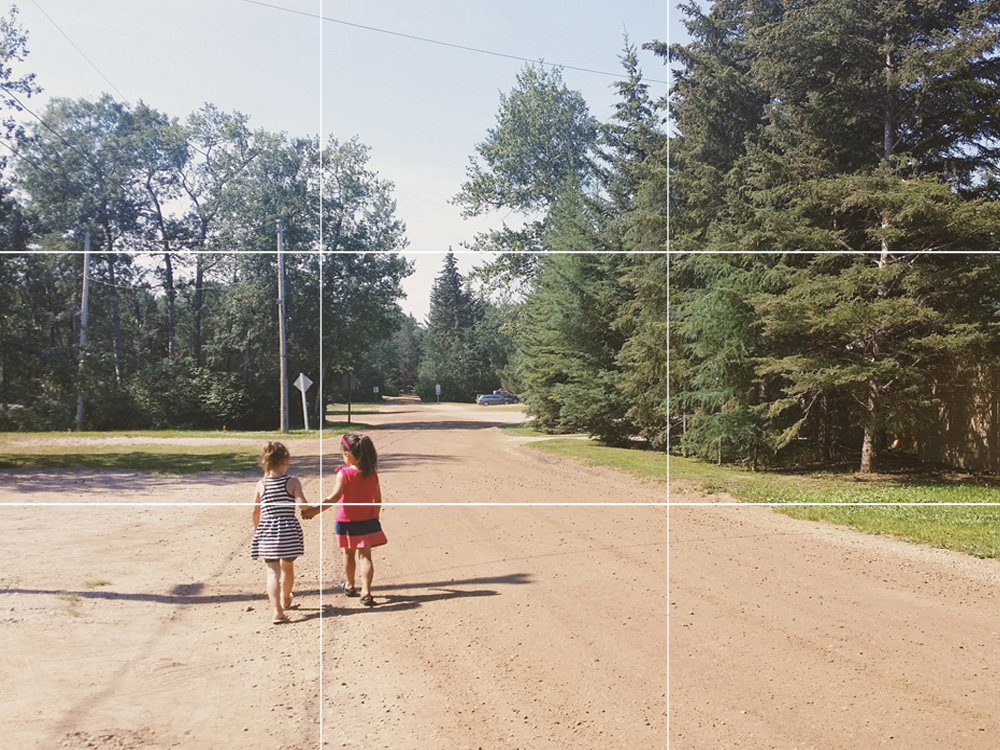
GRID
I love to have the grid setting turned on with my phone, I find it helps me to ensure my photos are straight (very important when you have the horizon or other defining lines in the shot), and because I love to follow the rule of thirds the grid makes it easy to make sure my subject is in one of the points where the lines intersect.

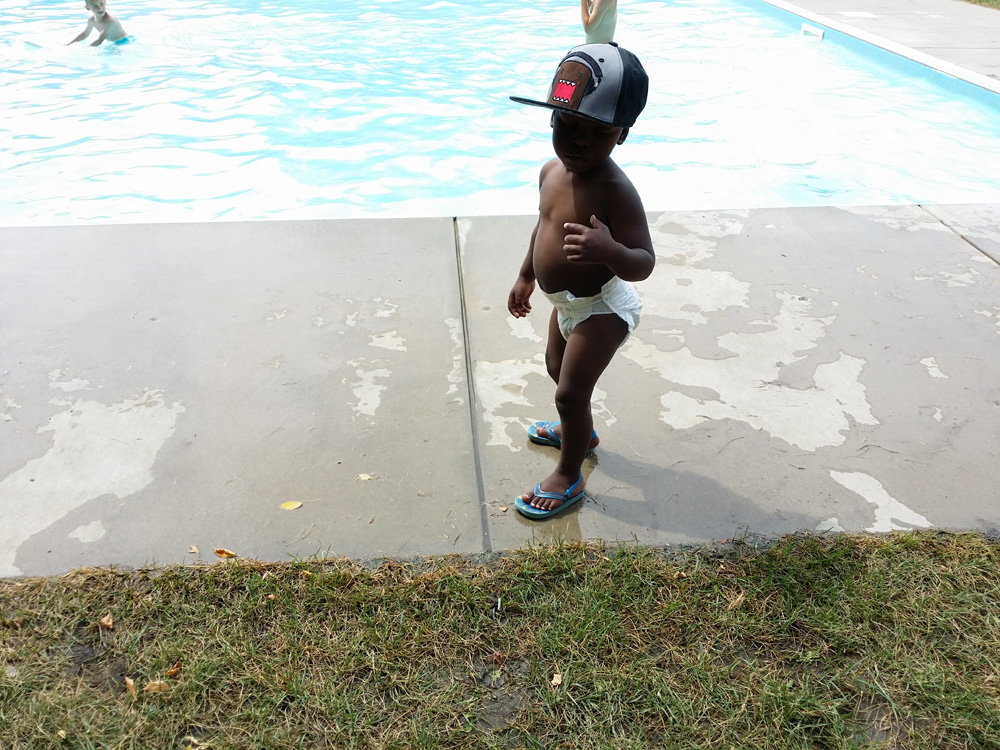
MOVE YOUR PHONE
Since your phone is automatically choosing the settings for your photo you might notice the darkness/lightness of your photo will change based on how you move your camera around. Try angling it down or up to see how that affects the exposure, or even moving it left or right or moving closer to or farther from your subject.
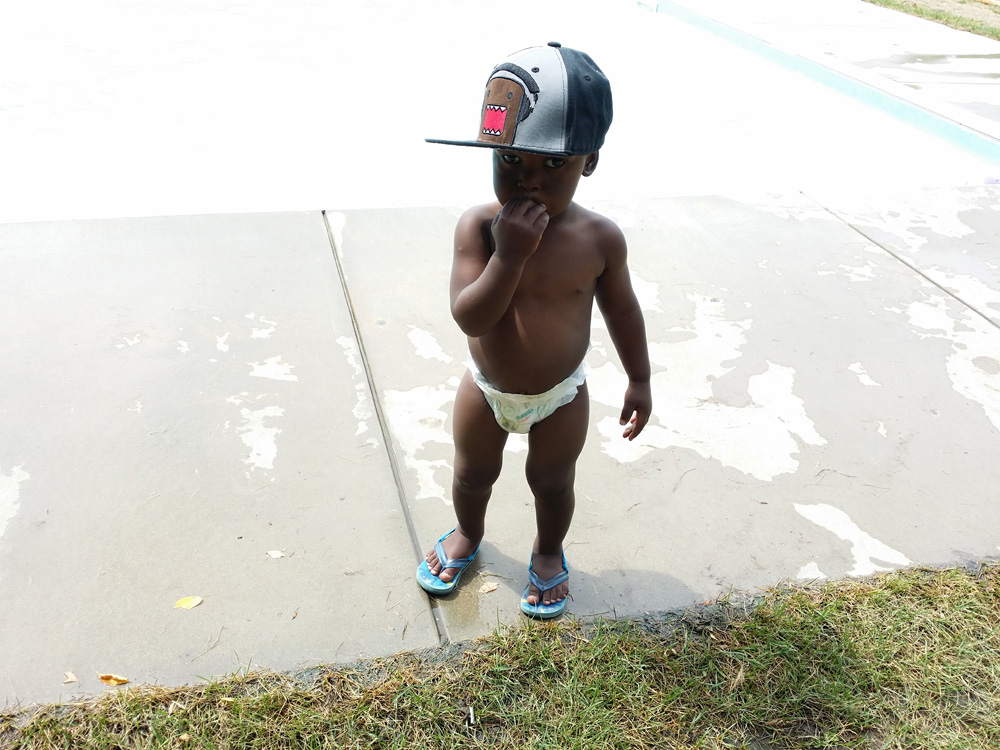
The photo examples below are both completely unedited photos taken within seconds of each other, the first photo was taken just from where I happened to be standing at the moment. At that point the brightness of the pool ended up making his face completely dark. For the second photo I came in a little closer, shot from a little higher above and angled my camera so a little less of the pool was showing and so it exposed his face a little better. Just slight movements can make a lot of difference.
Here is another example of the difference in exposure; just by changing the angle of my camera. For these photos I didn’t change any settings, I just slowly tilted my camera down:

MOVE YOURSELF
If you notice that you are moving your camera around and the lighting is changing but it’s still not what you are looking for, I like to move myself to find better light. After the photos from the previous section I realized I wanted more of a sun flare so I just moved myself a little to the left and got the shot below.
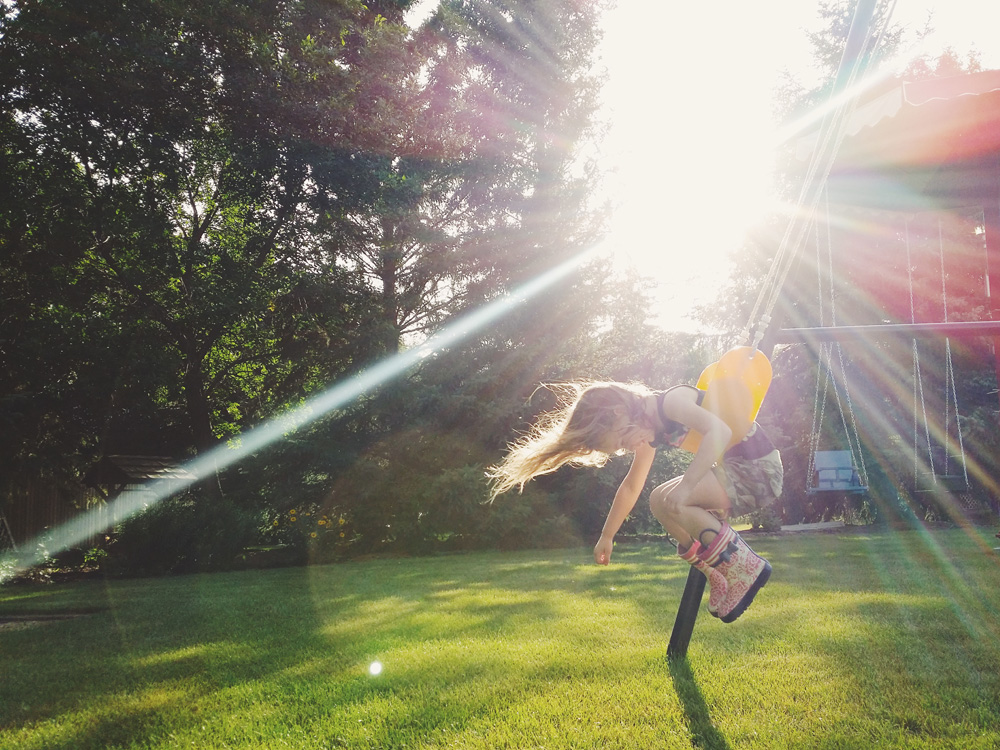
Just a reminder, these were the photos I took first:
EXPOSURE
Changing the exposure of an image in simple terms is just adjusting the brightness of the image, for most phones you can open up your camera and change the exposure in the settings.
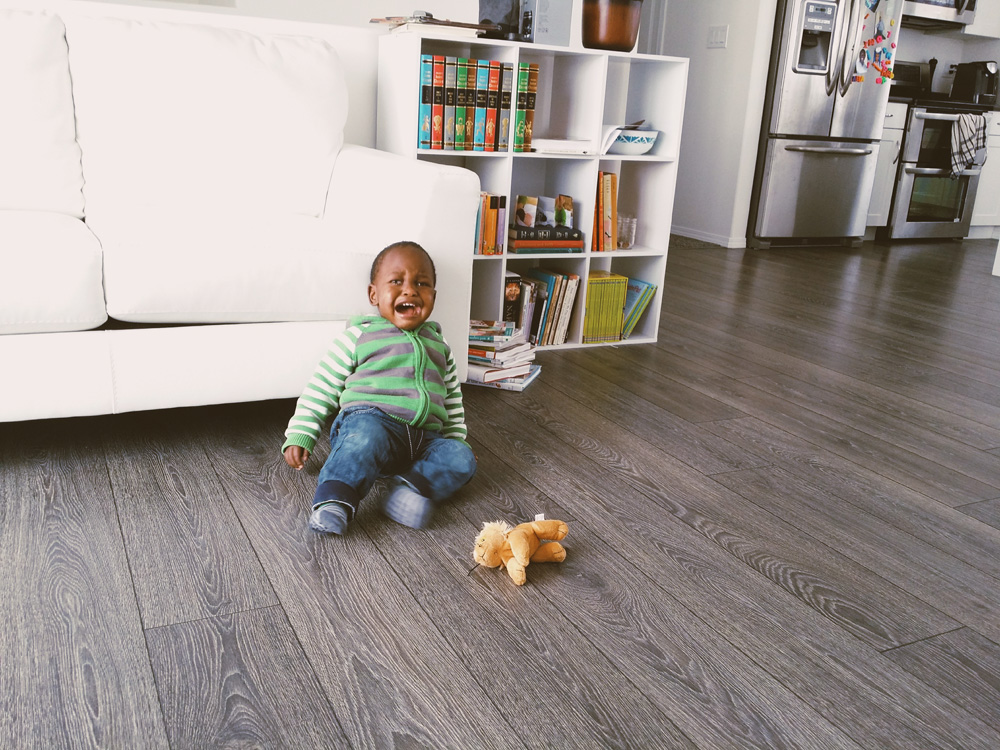
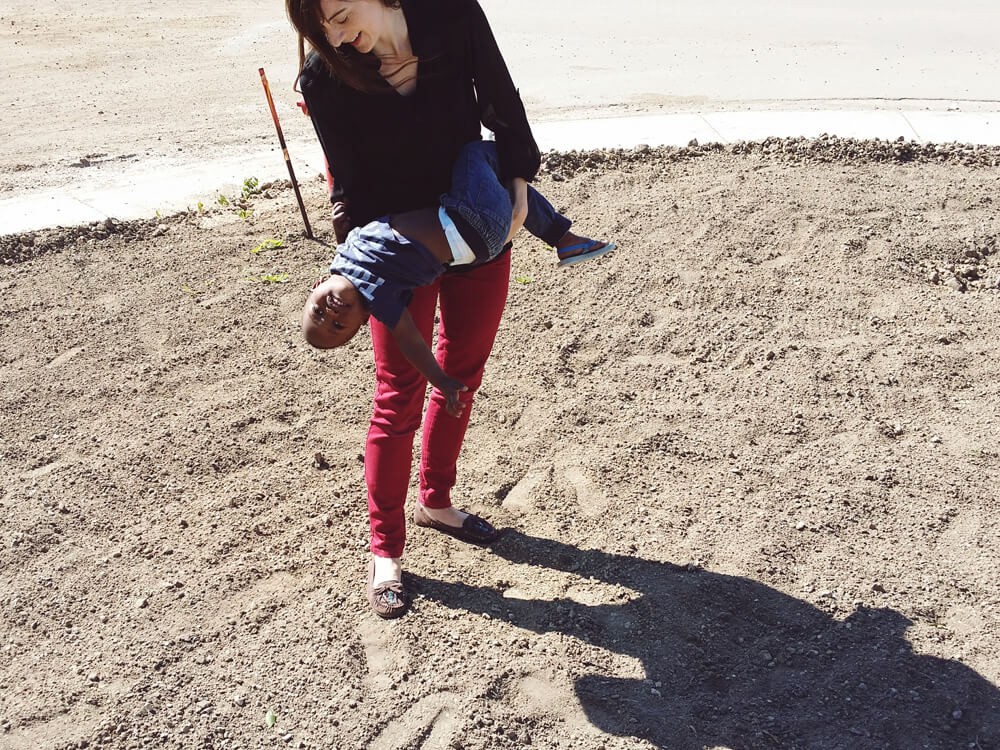
I find myself changing this setting the most often, especially having one Caucasian child and one African child my phone often gets confused as to how to expose my photo and I find myself often having to increase my exposure so I can get Ephraim’s features in the shot.
In the images below the image on the left is taken at +2, the middle one at 0 and the right one at -2. You’ll notice that even the image taken at 0 (the camera’s default) is still too bright, many parts of the tree are brighter than they should be. It just shows how much changing the exposure before you take a shot can make a bit difference.

WHITE BALANCE
Adjusting your white balance can make a big difference because it changes the coloring of your photo. This can be really usefully if you are indoors in a poorly lit room or for rooms that have a different color cast.
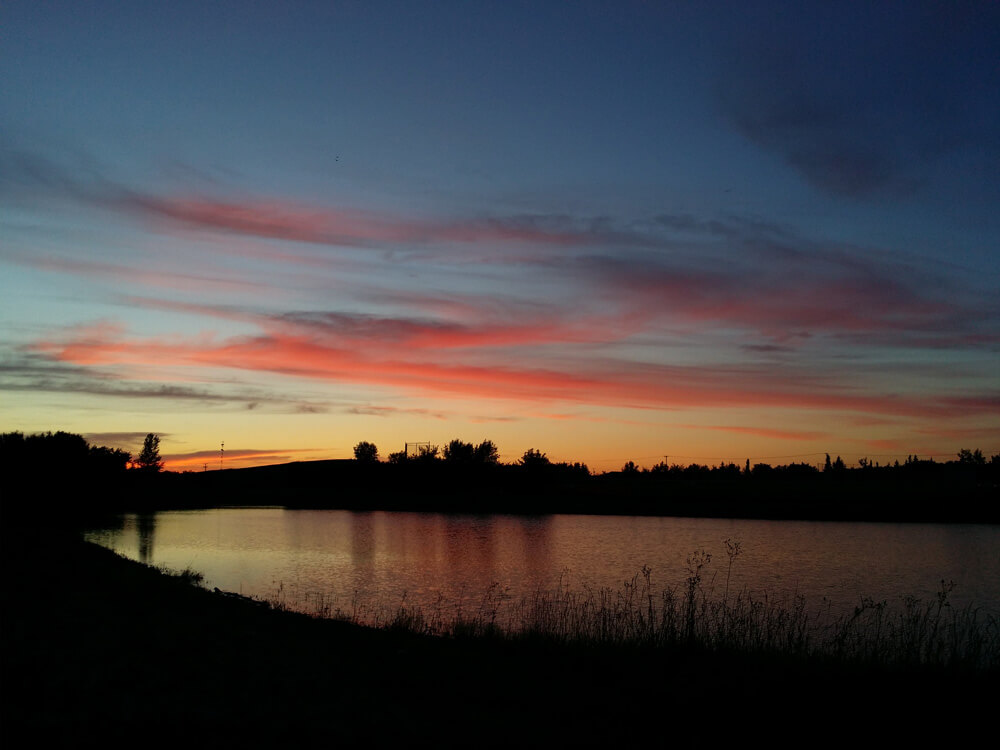
I find myself adjusting the white balance the most when I’m taking sunset photos. It is then that I notice the images my phone is capturing don’t correctly show the colors that I see at that moment. I usually find that the photos my camera takes at sunset are cooler than the colors that are actually in the sky.
In this example the first photo was taken on auto white balance, and while the sky still looks beautiful it isn’t as warm as the sunset truly was, so I set my white balance to cloudy and the result is the second image.

BURST
Another useful setting I like to use is burst mode, I just always have mine turned on and when I hold the capture button in it will continue to take photos until I let go (other phones and camera apps may turn this feature on differently but if you go into the settings it’s usually pretty easy to find).
Burst has been a lifesaver with a busy toddler like my son, the boy never sits still! I also love it for twirling photos, something my daughter loves to do.
One downside to burst mode is that it drains your battery faster and the high volume of photos end up taking a lot of memory. I find it works best to go in right after and delete all the ones I know I definitely won’t be editing, that saves me time in the long run and I make sure my phone always has space when I want to grab a quick photo.
EDITING
Editing your photos is completely optional but I find, when done correctly, it can take an okay photo and make it into an amazing one.
APPS
There are many great apps for editing photos, my favorites over the years include:
VSCO CAM
This is currently my primary photo editing app. I feel like it has all the basics, if it just had a tilt-shift and cloning tools it would be the perfect app to me. I have bought a number of the different preset bundles and the one I use usually depends on the mood I am going for in my photo.
PIC TAP GO
I loved Pic Tap Go but since I switched over to using an Android phone I’ve been unable to use it since it’s only available for the iPhone.
SNAP SEED
I know this is a fairly popular app, it has a lot of different options when it comes to editing, personally too many for me, I don’t want to spend all my time editing my photos, but for the odd time that I’m looking to edit a little more than usual I’ll pull up this app.
AFTERLIGHT
Another app that is fairly popular, I used this one more a few years ago but it still has some neat features.
Since I use VSCO Cam 99% of the time to edit my photos the examples to come will all include screenshots of adjustments made in that app, although these adjustments can almost all be made in the other apps listed above as well.
PRESETS
When editing my photos I always start with selecting the preset I want to use.
Most of the more common editing apps include a number of presets, some free and some paid. These presets have a few settings already saved so all you have to do is push the one button and it will do a number of things to your photo, such as change the brightness, saturation, tone, temperature, and contrast.
I usually like to use the same few presets to edit my photos so they feel like they flow, something I find important down the road when I go to create a photobook from my images. While I like to use the same presets I find that as my tastes change so do the handful of presets I use.
Also a good thing to note, you don’t usually need to use the preset at its full strength, you can usually tone it down so it doesn’t end up looking over edited.
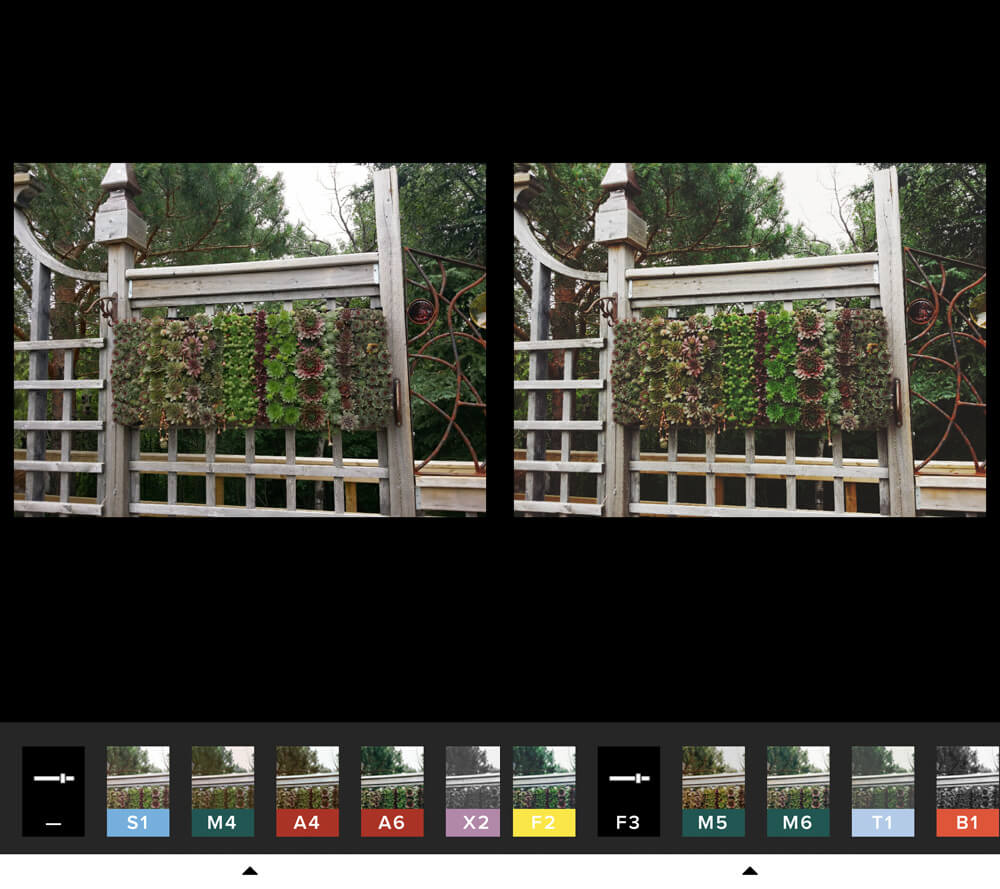
Below are some screenshots of images before and after a preset has been applied. I prefer to use presets as a way to enhance my photos and make they work together, not to completely change the look of the photo so you’ll notice there isn’t a major change from the original photo to the one with the preset. I will often 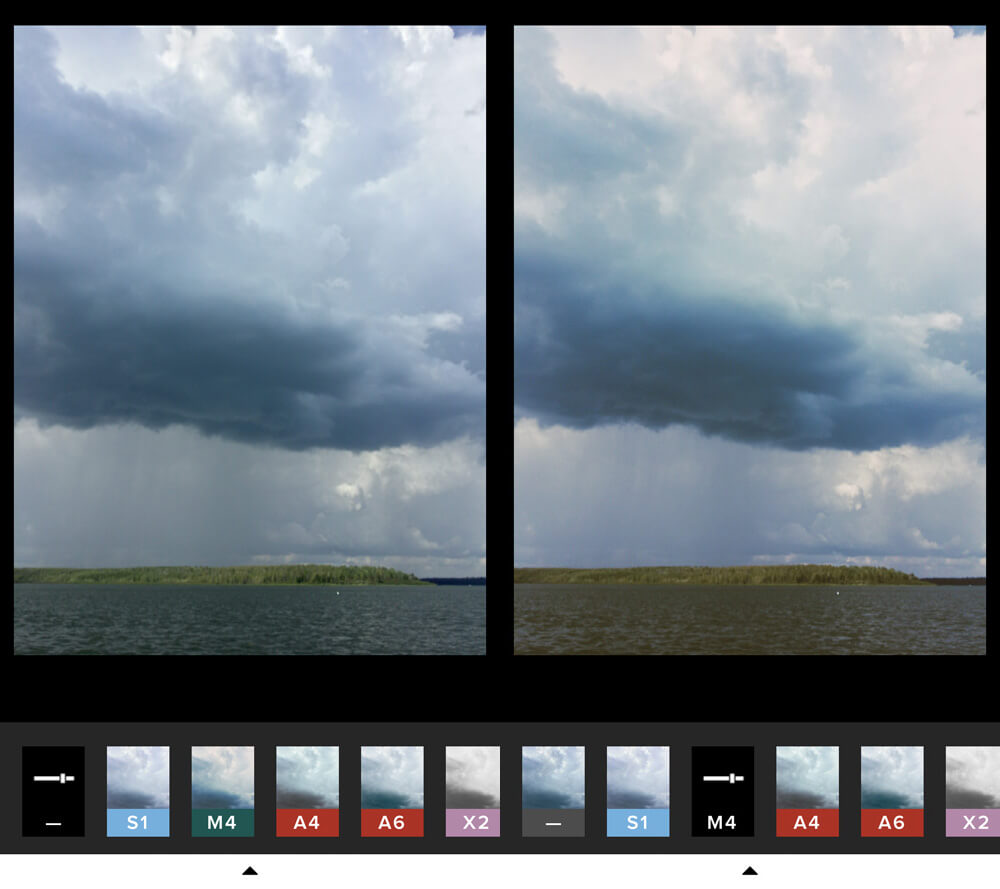

EXPOSURE
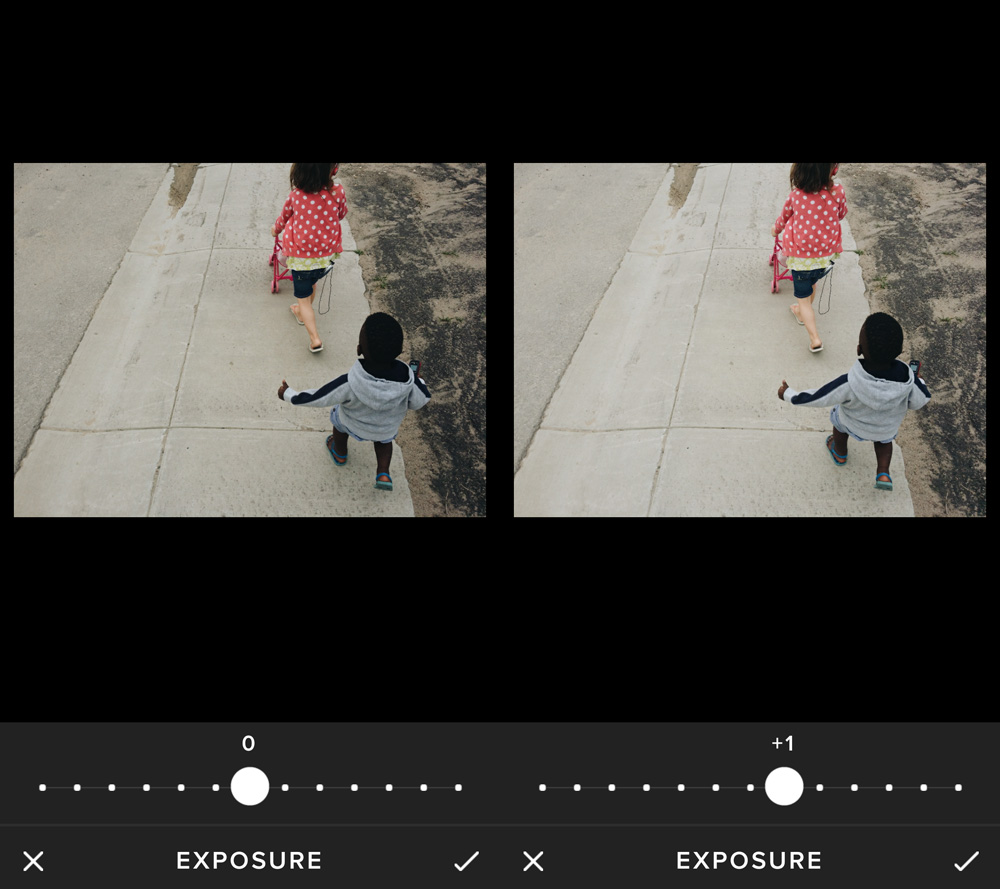
Even though I try to get my exposure right before I snap the photo sometimes I don’t have a chance to or I don’t get it quite right, so then I’ll bring it in to my editing app and adjust the exposure there.
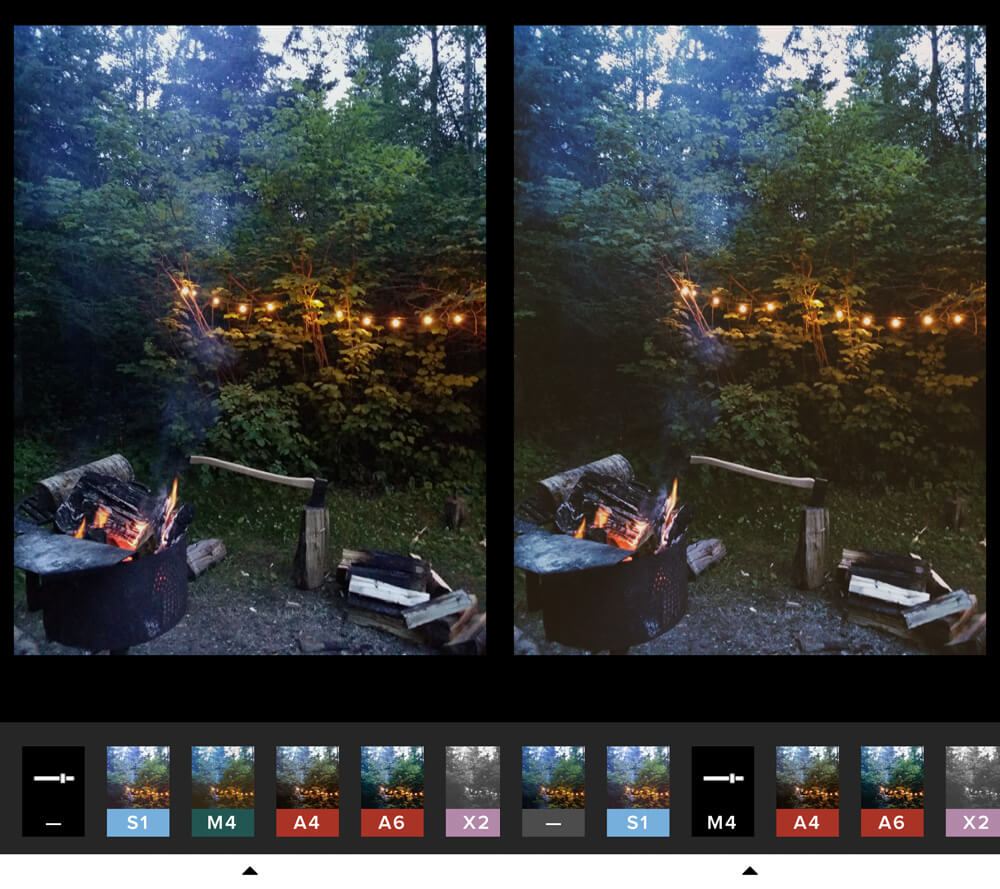
In this example I added my preset first and then went in and increased my exposure to +1.
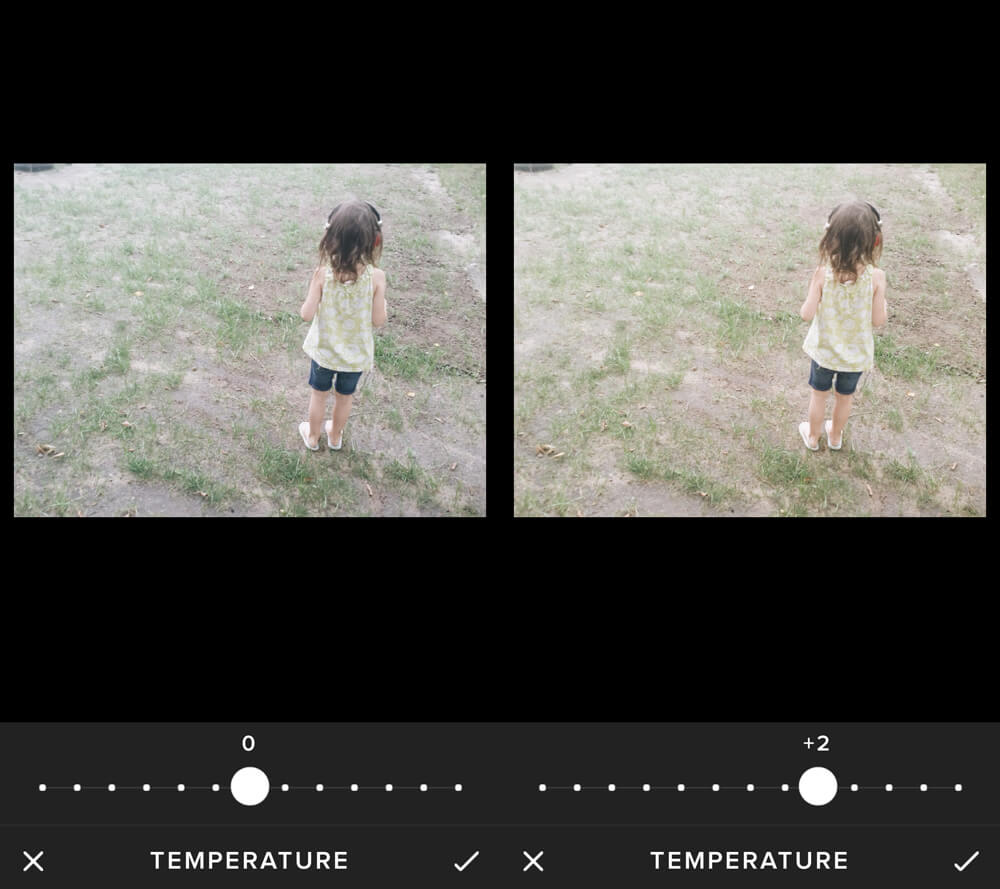
TEMPERATURE
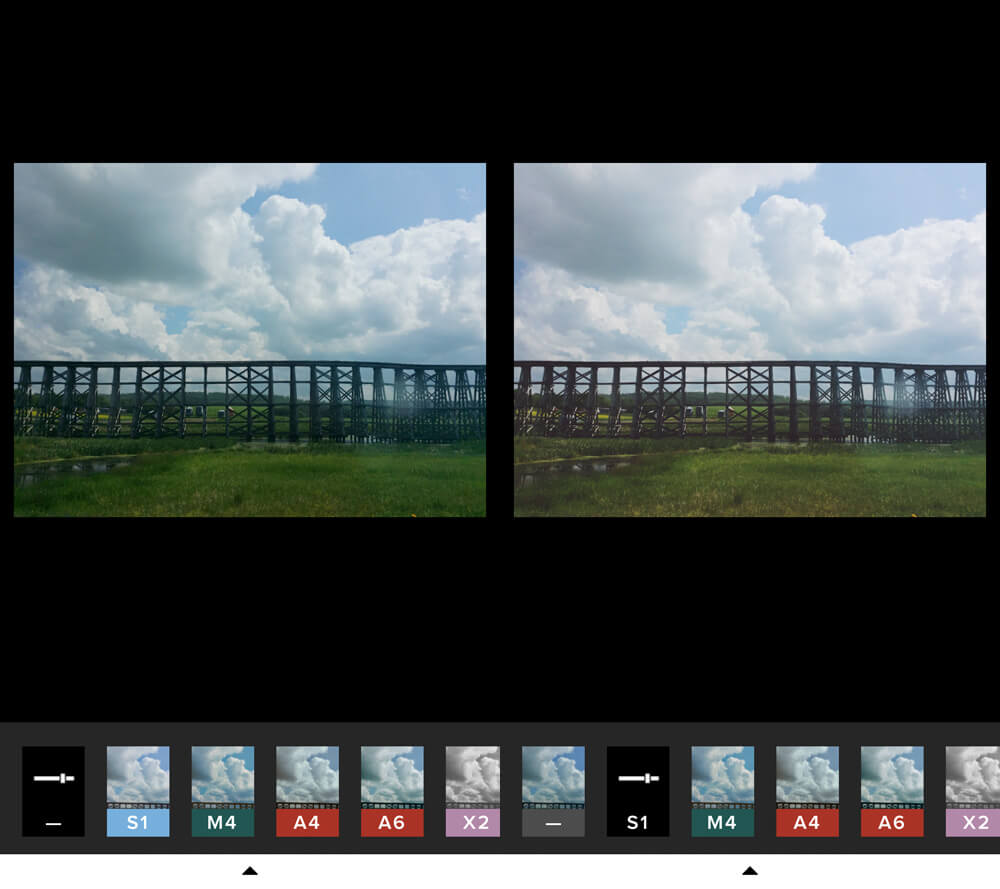
Temperature in a photo is really a matter of personal preference, I have always liked my photos to be on the warm side so after I’ve applied my preset if the photo still feels too cool to me I’ll go in and adjust the temperature up by one or two.
In this example I increased the temperature to +2.
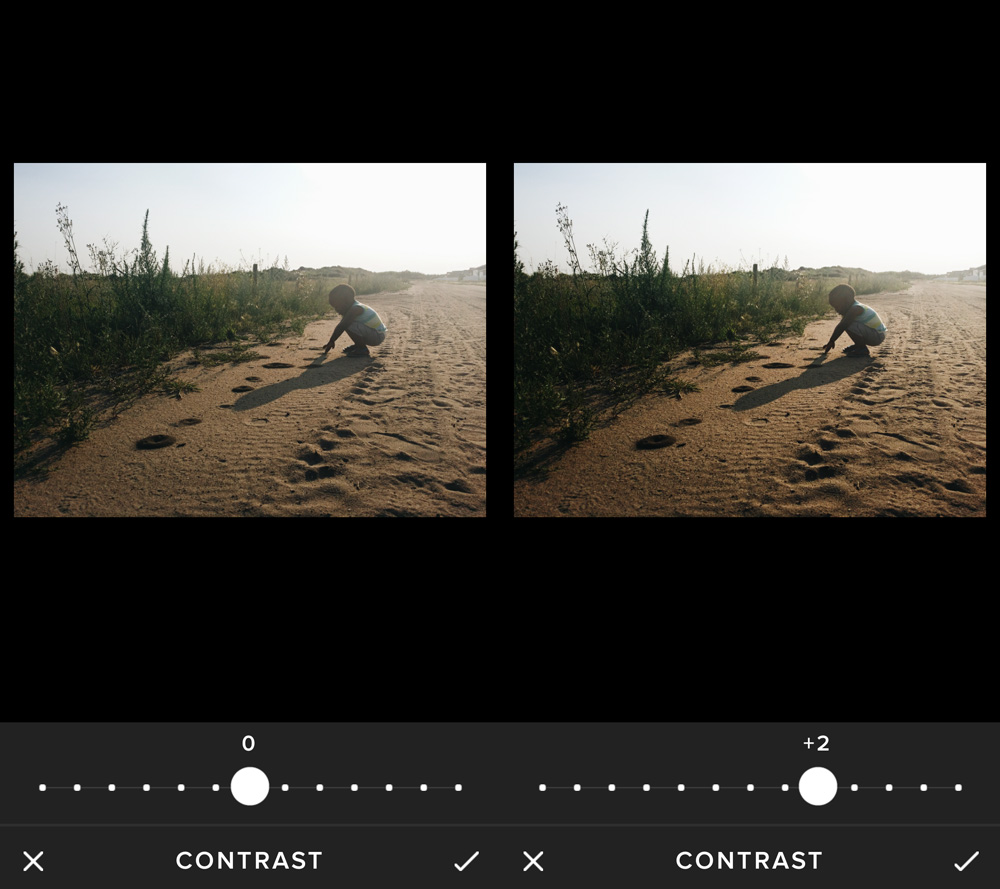
CONTRAST
Contrast can add some extra punch to photos. I pretty much always bump up the contrast for silhouette photos, especially ones that haven’t quite blacked out my subject, then I’ll just increase my contrast by one or two and my image will be a true silhouette.
Here I adjusted the contrast to +2.
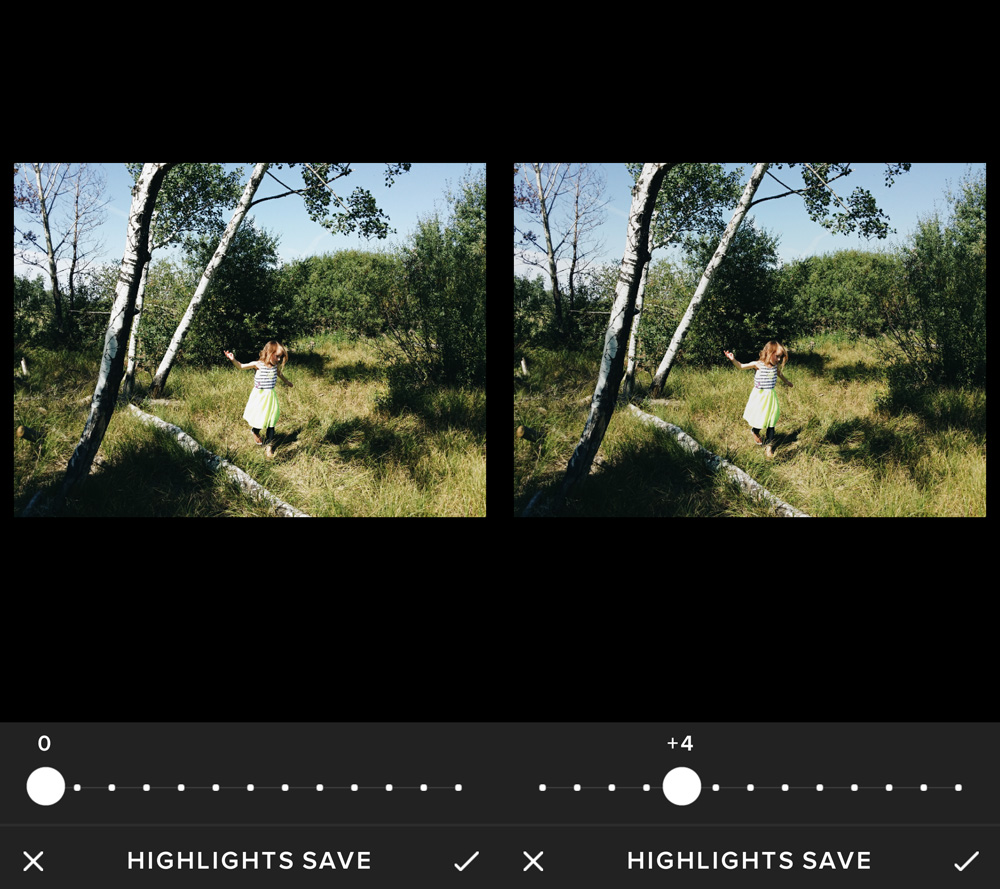
HIGHLIGHTS SAVE
I find myself using highlight save when I have photos with areas that are blown out that I want to bring back, like faces that or articles of clothing that got too bright (when the rest of the image is properly exposed).
Because it was so bright I found I had to increase the highlight save to +4 to bring back the details I wanted there.
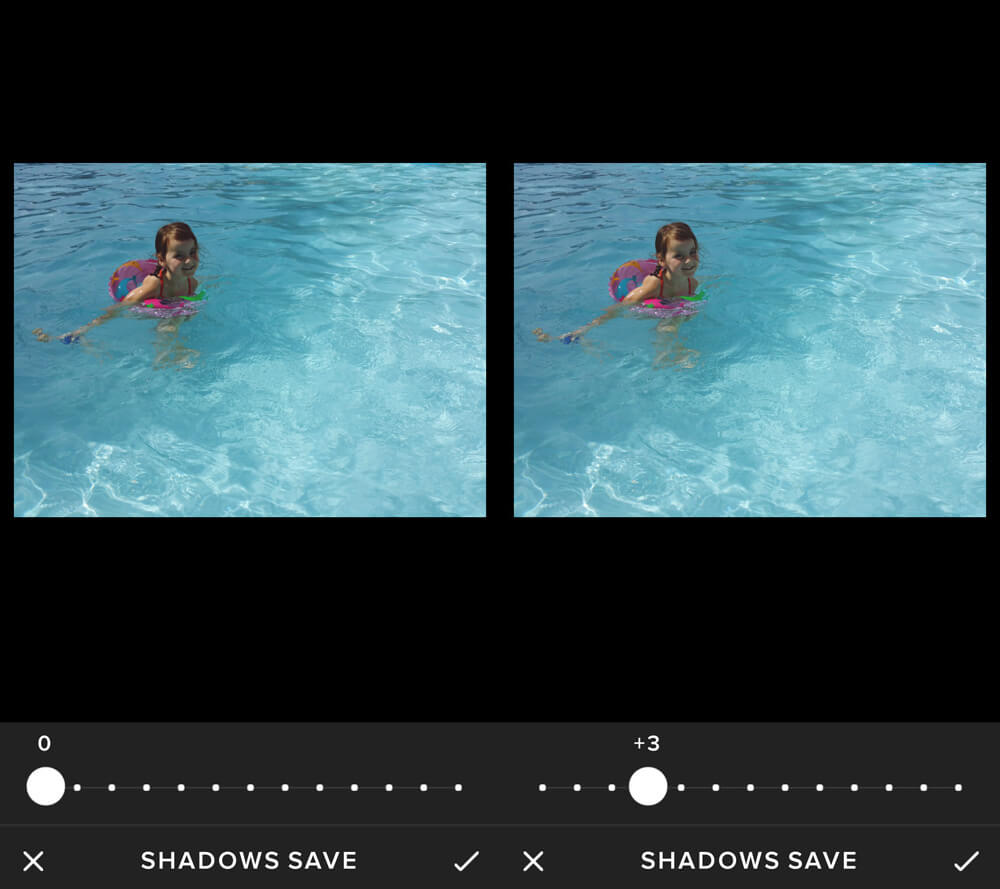
SHADOW SAVE
Shadow save is good for lightening the darker parts of the photo. I find myself using this one a lot when taking pictures of Ephraim, especially when I am taking them in full sun.
In this photo I increased the shadows save to +3 to show Raeca’s face a little better.
SATURATION
When I’m feeling the colors in my photo are washed out I like to increase the saturation of the photo a bit. I find it can be really easy to go overboard with saturation so I try to use it sparingly.
In this photo I increased my saturation to +1 to bring out the colors a little better.
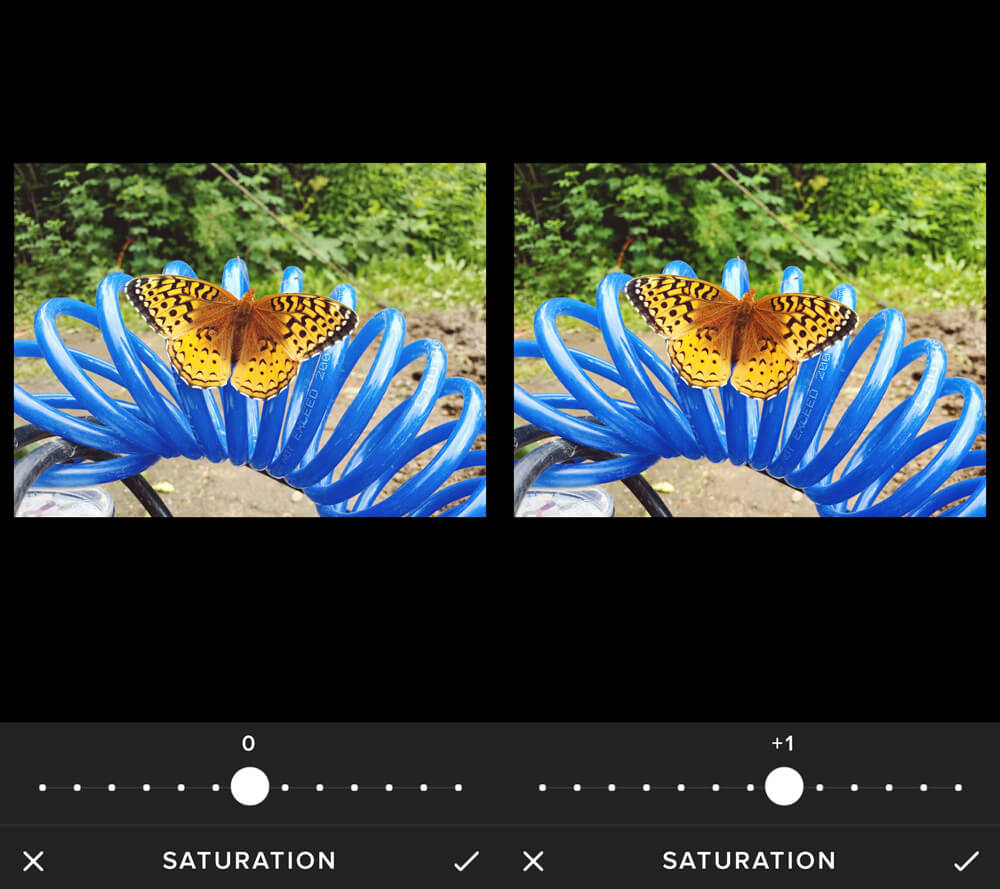
PHOTO CHALLENGE
Now that you’ve had a chance to read through the course and hear some of my favorite tips and tricks I’ve created a 30-Day Photo Challenge in hopes you will put them to use and try out different techniques.
Thirty Day Photo Challenge
Day One: capture a photo from above
Day Two: take a photo on auto white balance and one on cloudy, note the differences
Day Three: get a photo of yourself doing one part of your morning routine (like having your coffee or breakfast)
Day Four: edit a photo in black and white
Day Five: capture a story using 4-7 images
Day Six: get a detail shot
Day Seven: take a photo that is mostly shadows, with the light on your object
Day Eight: capture an expression
Day Nine: take a photo from below
Day Ten: capture movement (with or without blur)
Day Eleven: get a shot of one part of your evening routine
Day Twelve: take a zoomed out photo
Day Thirteen: change your exposure for a shot
Day Fourteen: capture an image with sun flare
Day Fifteen: photograph a collection (toys, rocks, books, whatever you have as a collection)
Day Sixteen: zoom in for a photo (do this by zooming yourself in, not your camera)
Day Seventeen: take a photo through something (an object around at the time, a toilet paper roll, etc)
Day Eighteen: if you have kids, capture a photo of one of them in their favorite outfit, or yourself in your favorite outfit, it will be fun to look back on in the years to come
Day Nineteen: take a silhouette photo
Day Twenty: get a shot of the book you are currently reading (or your favorite book)
Day Twenty-One: edit your photo using a different preset than you normally do
Day Twenty-Two: capture some images in burst mode
Day Twenty-Three: try using a different app for editing than you usually do
Day Twenty-Four: photograph something in your daily commute
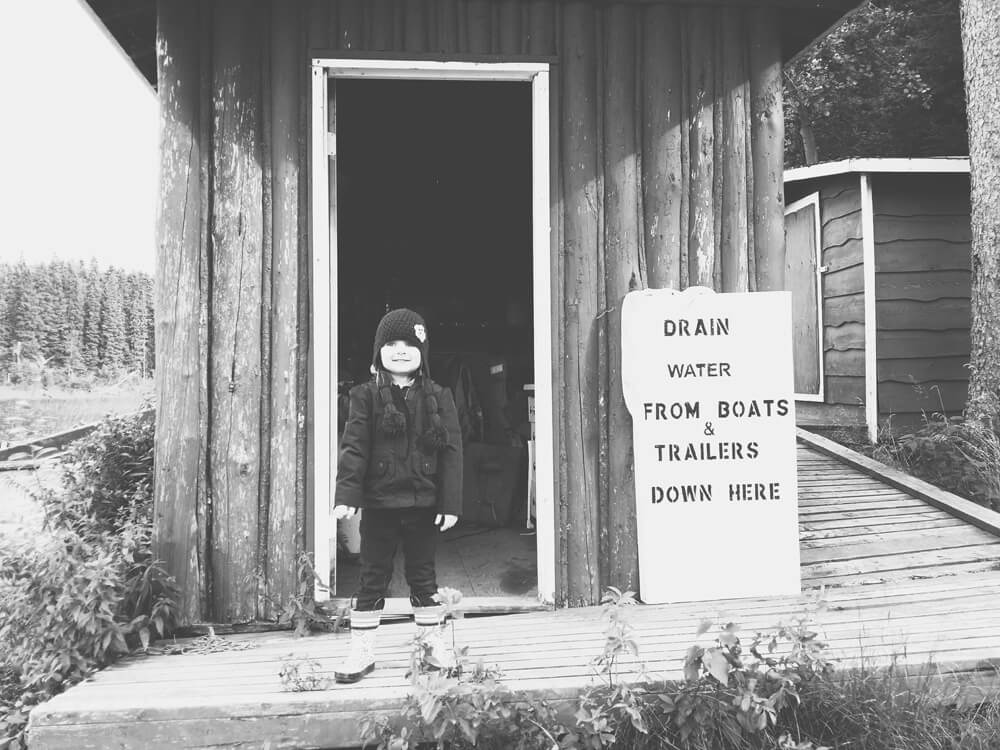
Day Twenty-Five: find some numbers throughout your day and photograph them (the time, speed limit, level of the parking garage, etc)
Day Twenty-Six: capture an image using the rule of thirds (have the subject in one of the points where the lines intersect on the grid on your phone)
Day Twenty-Seven: stand in one spot and see how many different photos you can capture without moving (though you can turn around), look up, look down, look behind you, etc.
Day Twenty-Eight: photograph the sunset and try changing the white balance to a few different settings
Day Twenty-Nine: become the silent paparazzi and photograph an interaction of two or more people you know
Day Thirty: get in the shot yourself! use a timer, selfie stick, camera remote or hand the phone off to someone else, just make sure you do it!
THAT’S IT!
Thanks so much for taking this course!
I hope you have been able to take away some tips and tricks on how to capture your day to day life and how to stay present in the moment.